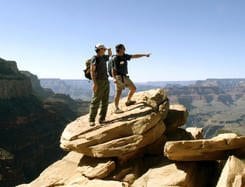
Get Grand Pictures At The Canyon
The Grand Canyon presents a myriad of photographic opportunities for the amateur photo enthusiast. But do terms like Aperture, Shutter speeds, Focal length, ISO, Telephoto, Macro, Bokeh and White balance, throw you off balance?  They used to have a pretty adverse effect on me, and made me run a mile in the opposite direction…until I stopped, used my head and realized that photography isn’t all about technique or terminology. It is about timing, composition and patience. And I am pretty sure you have these three attributes.
If you are an amateur photographer and are looking to capture the Grand Canyon in all its pristine glory, then these three qualities are all you need, along with some helpful Grand Canyon Photography tips, of course. In this concise article, you will know the best times to take Grand Canyon pictures, zero down on the best locations for photo opportunities and of course, get that much needed courage to try out different settings on your DSLR.
Tip#1: Best Times to Capture – Wake up early to get in some Pre-dawn shots or hang around till dusk and late evening until after dark. This is when you can capture some awesome shadows and experience ambient light for your subjects. A great time to visit would be during the season of rains. From July through late September, the skies offer dramatic spectacles, with looming clouds, fantastic lightning storms and if you are lucky, the occasional and vibrant double rainbows.
Tip#2: Best Subjects – The Grand Canyon is full of interesting subjects and offers great perspectives. This is a haven for the landscape enthusiast. From Striated rocks, craggy rock formations, mesmerizing overhangs and bridges, dynamic skies, to emerald green waters, diverse wildlife, ancient trees with their peeling bark, and canopies of rocky hues, everything is a picture. Though slightly expensive, take a helicopter ride for some aerial views of the Canyon photograph even better.
Tip#3: Best Viewpoints – Although the South Rim boasts of many fantastic viewpoints and Grand Canyon attractions, if you are looking to beat the crows, head to the North Rim. There is a huge list of them too – Naji Point, Atoko Point, Widforss Point, Bright Angel Point, Cape Royal, Cape Final, Roosevelt Point, Point Imperial, Uncle Jim Point, Honan Point. Phew! Or just walk around, and discover the best locations by yourself.
Tip #4: Best Lighting – Don’t shoot with the sun directly at your back. Try a side-lit angle or where the light falls from a totally unconventional angle. Be bold and experiment with shadows and textures. Of course, one basic rule always applies – Do not take pictures with the lens pointed at the sun.
Tip#5: Best Camera Kit – A tripod or a monopod – It’s a must have if you are planning to take pictures at dusk. Lens –An 18-135 mm or anything up to 300mm. A wide angle lens is good to have. Otherwise, just take a series of linear shots and create a Panorama through photo editing software. Filters – UV and Polarizing. These protect your lens from direct sunlight and create ambient lighting. A lens cleaning kit is a must with so much dust all around. Also, carry a waterproof dry bag if you are planning to take pictures during the rainy season.
Since most subjects in the Grand Canyon are static, feel free to experiment with your camera settings. Just mount the camera on a Tripod and play around with the ISO, Aperture, and Shutter speed. They are all synergistic.


