
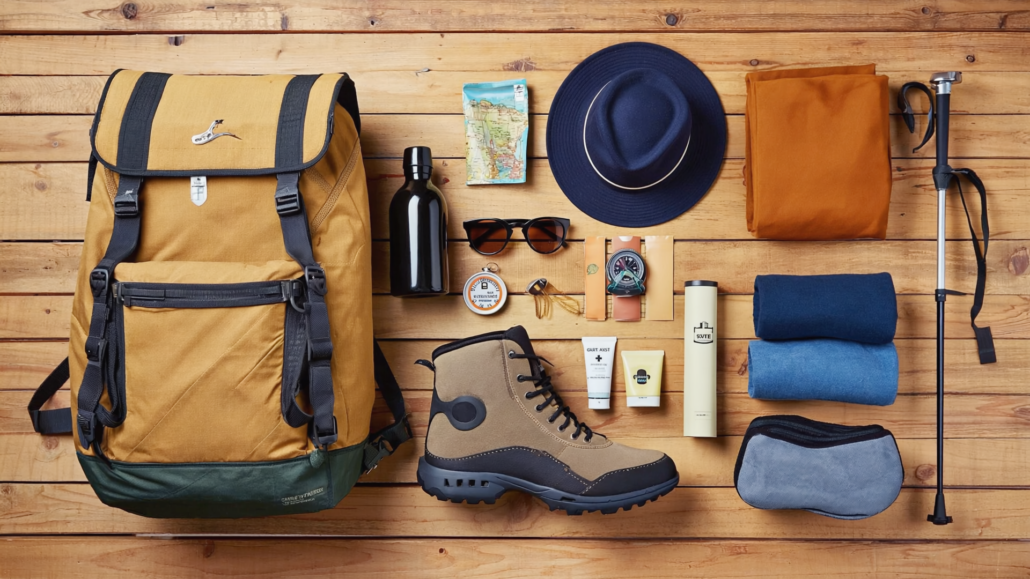
12 Must-Know Grand Canyon Packing List Essentials for Every Season and Trail Type
Most people who underpack for the Grand Canyon do so for the same reason: they look at photos, see a beautiful landscape, and plan accordingly for a scenic overlook experience. Then they step onto a trail and discover that the Grand Canyon is not one environment, it is a stack of completely different climates, terrains, and physical demands layered on top of each other, separated by thousands of feet of elevation. The South Rim sits at roughly 7,000 feet above sea level. The Colorado River at the bottom hovers around 2,500 feet. That 4,500-foot difference means temperature swings of 20 to 30 degrees, dramatically different vegetation, and wildly different trail conditions, sometimes on the same day, sometimes within the same hike. Getting your packing list right is not just about comfort. It is about safety, stamina, and actually being able to enjoy one of the most spectacular places on the planet rather than suffering through it.
This guide covers 12 essential packing categories for every Grand Canyon visitor, whether you are doing a quick South Rim overlook walk in January, a day hike down Bright Angel Trail in the summer, or a multi-day backcountry adventure in the fall. Each section addresses not just what to bring, but why it matters and how conditions at the canyon specifically affect your gear choices in ways that standard hiking advice misses.
Why Grand Canyon Weather by Season Changes Everything About Your Packing List
Grand Canyon weather by season is one of the most misunderstood aspects of planning a visit to the park. The canyon does not follow a simple warm-summer, cold-winter pattern. It operates on multiple climate zones simultaneously, and the gap between rim conditions and inner canyon conditions is large enough to catch even experienced hikers off guard.
Spring (March Through May)
Spring is arguably the most deceptively variable season at the canyon. The South Rim can swing between freezing overnight temperatures and warm, sunny afternoons in the same 24-hour period. Inner canyon temperatures start climbing rapidly in May, and flash flood risk begins to rise as desert monsoon patterns start building. Hikers descending in comfortable rim weather often find inner canyon temperatures ten to fifteen degrees warmer than expected, with little shade below the Tonto Platform. Spring snow is entirely possible on the rim through April, meaning trail surfaces at higher elevations can be icy in the morning and dusty by noon. Packing for spring means layering for everything simultaneously.
Summer (June Through August)
Summer is the deadliest season for canyon hiking and also the most popular. Inner canyon temperatures routinely exceed 110°F in July and August. The National Park Service issues heat-related warnings and sometimes closes inner canyon trails during the peak afternoon hours. The monsoon season, which typically begins in mid-July, brings sudden violent thunderstorms, flash flooding in side canyons, and lightning risk on exposed rim trails. Summer visitors need maximum sun protection, extraordinary hydration capacity, and a realistic understanding that inner canyon hiking should begin before sunrise and end by mid-morning.
Fall (September Through November)
Fall is widely considered the best season to hike the canyon. Temperatures moderate, the monsoons taper off, and trail crowding decreases noticeably after Labor Day. However, October and November can bring early winter conditions to the rim, including ice and snow on upper trail sections. The inner canyon remains warm through October, creating a pleasant hiking window. Fall visitors get the most forgiving conditions but still need to prepare for rapidly changing weather as November approaches.
Winter (December Through February)
Winter is the most underrated season for a Grand Canyon visit. The rim receives far fewer visitors, the light is extraordinary for photography, and temperatures on sunny afternoons can be genuinely pleasant. However, icy trail conditions on the South Rim and upper sections of Bright Angel and South Kaibab trails are a serious hazard. The inner canyon is often the most comfortable hiking environment in the park during winter, with mild temperatures and clear skies. Winter visitors who are properly equipped experience the canyon in a way that most tourists never will.
Essential #1: Hydration System Built for Desert Extremes
Hydration is the single most critical factor in canyon safety, and the canyon’s specific conditions make standard hydration advice insufficient. The combination of dry air, high elevation at the rim, intense solar radiation on exposed trail sections, and physically demanding descents and climbs creates dehydration conditions that are more severe than most hikers anticipate.
A basic water bottle is not enough. Experienced canyon hikers and park rangers consistently recommend carrying a minimum of one liter of water per hour of hiking in warm conditions, and even more during summer. For a day hike down Bright Angel Trail to Indian Garden (now called Havasupai Gardens) and back, a round trip of about nine miles, that translates to a substantial water volume that exceeds what most standard hydration packs carry.
What to Actually Pack
A hydration reservoir (bladder) of at least three liters is the baseline recommendation for any inner canyon hiking. Supplement this with at least one hard-sided water bottle, because reservoirs can fail on rocky terrain. Electrolyte tablets or powder are not optional in summer, they are safety equipment. Drinking water without electrolytes in extreme heat accelerates hyponatremia (low sodium), a dangerous and sometimes fatal condition that has affected canyon visitors who drank large volumes of plain water without replacing salts.
Water availability varies by trail and season. Bright Angel Trail has water stations at the 1.5-mile resthouse and at Havasupai Gardens (water is shut off in winter). South Kaibab Trail has no water sources at all below the rim, making it a poor choice for descending in summer without an extremely large water supply. Knowing your trail’s water availability before you leave the rim is a non-negotiable part of trip planning. For current water availability, check the National Park Service’s Grand Canyon water availability page before your visit.
Essential #2: Sun Protection That Matches the Canyon’s UV Intensity
The South Rim sits at high altitude, and altitude significantly amplifies UV radiation exposure. The inner canyon adds a unique compounding factor: the pale sandstone and limestone walls reflect sunlight back toward hikers from multiple angles, meaning sun exposure is not just coming from above but from the sides as well. Standard sunscreen application is rarely enough on its own.
Building a Complete Sun Protection System
A broad-spectrum sunscreen with SPF 50 or higher is the minimum, and it should be reapplied every 90 minutes, not just at the trailhead. More important than sunscreen for all-day exposure is physical sun protection: a wide-brimmed hat that shades the face, neck, and ears; a lightweight long-sleeve sun shirt (UPF 50+ rated); and UV-protective sunglasses with wraparound or side-shield coverage.
Lightweight sun gloves are worth considering for hikers who burn easily on their hands, particularly on exposed ridge sections of South Kaibab where hand-over-hand scrambling can orient the backs of hands directly toward the sun for extended periods. A buff or neck gaiter serves double duty as sun protection on the neck and face and as a cooling tool when dampened with water from a stream crossing.
Essential #3: Footwear Matched to Your Specific Trail and Season
Footwear is where most casual visitors make their most consequential gear mistake. The trail conditions at Grand Canyon vary more dramatically by trail type, season, and depth below the rim than almost any other hiking destination in the country. There is no single “right shoe” for the Grand Canyon, but there are several wrong ones.
Trail Condition Realities by Season and Depth
The upper sections of Bright Angel and South Kaibab trails are paved near the rim and transition to compacted dirt and loose rock. In winter, these upper sections develop ice that makes standard hiking shoes genuinely dangerous. Many experienced winter visitors carry lightweight microspike traction devices (such as Yaktrax or Kahtoola Microspikes) to clip over their hiking shoes for the icy upper trail sections, removing them once the trail thaws lower down.
In summer and fall, the concern shifts to heat transfer from trail surfaces and ankle stability on loose scree. Trail runners with aggressive lugs work well for experienced hikers on maintained trails. For anyone venturing off maintained trails or into the Tonto Platform and beyond, mid-height hiking boots with ankle support and a stiff midsole become the better choice.
Sandals, flip-flops, and flat-soled sneakers are seen on canyon trails regularly and are consistently identified by rangers as a leading factor in ankle injuries and emergency rescues. The trail is not a sidewalk. Even the paved sections near the rim are steep enough to create significant shear force on improper footwear. The park’s own safety messaging explicitly discourages these shoe choices on any trail below the rim.
Breaking In Footwear Before You Arrive
Whatever footwear you choose, it must be broken in before your canyon hike. The combination of steep descent and long distance on a trail like Bright Angel creates intense friction on the toes and heel that will destroy unprepared feet in new shoes. Blisters that seem minor at the two-mile mark become trip-ending problems at the turnaround point, six miles from the rim.
Essential #4: Layering System for Multi-Zone Temperature Management
Understanding the canyon as a multi-zone environment transforms how you approach clothing. The three-layer system widely used in alpine environments translates directly to canyon hiking, though the specific materials and weights differ by season.
The Core Layering Framework
The base layer should always be moisture-wicking synthetic or merino wool, never cotton. This applies in every season. Cotton holds moisture against the skin, which creates chilling in cool conditions and prevents evaporative cooling in hot conditions. A moisture-wicking base layer, even a lightweight short-sleeve shirt, keeps the skin drier and more comfortable across a wider range of temperatures.
The mid-layer is the temperature-regulation tool. In summer, this layer is often not needed below the rim at all, but it belongs in your pack for the return climb to the cool rim. A lightweight fleece or insulated vest weighs almost nothing and makes a dramatic difference in comfort during rest stops on a cool day or on a cold morning start. In fall and winter, a proper insulated jacket (down or synthetic) is necessary for rim-level temperatures and for any trip that extends past sunset.
The outer layer is your weather shield. A packable rain jacket is a year-round necessity at the Grand Canyon, not because rain is always likely but because when it arrives, it arrives fast and violently, particularly during monsoon season. A jacket that compresses to the size of a softball costs little to carry and provides critical protection from wind, rain, and the rapid temperature drop that accompanies afternoon thunderstorms.
Essential #5: Navigation Tools That Work When Cell Service Fails
Cell service is unreliable or absent on most canyon trails, particularly once you descend below the rim. Modern travelers who rely entirely on smartphone navigation apps for trail guidance are making a dangerous assumption. Apps that require an active data connection will fail in the inner canyon. Even apps with offline maps can fail if a phone battery is drained by heat or cold.
Backup Navigation Essentials
A printed or laminated trail map is the simplest and most reliable backup. The National Park Service provides free maps at the visitor center and ranger stations, and they are waterproof enough for a day hike. For more serious hiking, the Trails Illustrated topographic map of the Grand Canyon is widely regarded as the most accurate and detailed printed resource for trail navigation in the park.
A compass is worth adding to any pack for hikers venturing beyond maintained trails. The canyon’s geology creates magnetic anomalies in some locations, but a baseplate compass combined with a good topo map provides reliable directional reference. A GPS device with pre-loaded Grand Canyon maps, kept separate from your smartphone, provides the most robust navigation system for serious hikers.
Knowing the trail markers specific to your chosen route is equally important. South Kaibab and Bright Angel trails are clearly marked with mileage signs and colored trail markers. Less-traveled trails like the Hermit Trail or Grandview Trail have less signage and demand more navigation confidence.
Essential #6: Emergency Signaling and Communication Gear
The Grand Canyon receives hundreds of search and rescue operations annually. Many of these involve hikers who had no means of communicating their location or distress to rescuers. The remoteness of the inner canyon and the absence of cell service creates a communication gap that requires specific equipment to bridge.
Personal Locator Beacons and Satellite Communicators
A personal locator beacon (PLB) or satellite messenger device is strongly recommended for any overnight backcountry trip and is worth carrying on any significant day hike. Devices like the Garmin inReach series allow two-way satellite text messaging with emergency SOS capability regardless of cell coverage. In a genuine emergency, this technology is the difference between a rescue measured in hours and one measured in days.
A high-decibel whistle (the Fox 40 pealess design is widely recommended for outdoor emergencies) costs almost nothing, weighs almost nothing, and can signal distress across distances that a human voice cannot reach. Attach it to a pack strap where it can be accessed without removing the pack. A signal mirror, while less commonly carried, can attract the attention of search aircraft at distances of several miles in clear conditions.
Essential #7: First Aid Kit Customized for Canyon-Specific Hazards
A generic drugstore first aid kit covers basic cuts and blisters but leaves out several items that are specifically relevant to canyon hiking. Building a customized kit for Grand Canyon conditions takes about 20 minutes and dramatically improves your ability to handle the most common trail emergencies.
Canyon-Specific First Aid Priorities
| Hazard | First Aid Item | Why It Matters |
|---|---|---|
| Blisters | Moleskin, blister pads, needle | Steep descent creates intense friction; unmanaged blisters stop hikes |
| Heat exhaustion | Electrolyte packets, cooling towel | Inner canyon temps exceed 110°F in summer; electrolytes prevent hyponatremia |
| Ankle sprains | ACE bandage, trekking pole | Loose rock and steep grade make ankle rolls common; immobilization aids descent |
| Sunburn | Aloe gel, extra SPF 50+ | Reflected UV from canyon walls accelerates burn; secondary application often forgotten |
| Hypothermia (winter/night) | Emergency foil blanket | Compact and lightweight; critical if stranded after sunset in cold months |
| Cuts and abrasions | Antiseptic wipes, adhesive bandages, medical tape | Sharp limestone and sandstone edges are common hazards on off-trail sections |
| Eye irritation | Saline eye wash | Wind carries fine dust and grit at rim level, particularly in spring and fall |
Medications also deserve attention. Ibuprofen or acetaminophen for pain and inflammation is standard. Anyone with known altitude sensitivity should discuss preventive medication with their physician before arriving at a 7,000-foot rim. Antihistamines are useful during spring wildflower season when pollen levels rise in the canyon’s riparian zones.
Essential #8: Food Strategy for Energy and Heat Management
Caloric needs during a Grand Canyon day hike are substantially higher than most visitors expect. The descent is deceptive because it feels easy, the real physical work happens on the ascent, which is typically done in the warmest part of the day if hikers do not plan their timing carefully. A moderate day hike of eight to ten miles with significant elevation change burns calories at a rate comparable to a serious gym workout, and the heat compounds energy expenditure further.
What to Pack and What to Avoid
The fundamental principle for canyon food packing is caloric density combined with heat stability. Foods that melt, spoil quickly, or require refrigeration create problems in the inner canyon heat. Chocolate bars become liquid, soft cheeses turn in the heat, and anything in a jar adds unnecessary weight.
Ideal canyon trail food includes: trail mix with a mix of nuts, seeds, and dried fruit for sustained energy; energy bars that maintain their form in heat (look for bars with a higher nut-to-chocolate ratio); jerky and pemmican-style protein snacks; nut butter packets that provide fat and protein without refrigeration; and crackers or flatbreads that are calorie-dense and lightweight.
The pacing of food intake matters as much as what you bring. Eating small amounts continuously (grazing) maintains blood sugar more effectively than large meals with long gaps. Many experienced canyon hikers eat every 45 minutes to an hour during active hiking, consuming a handful of trail mix or half an energy bar to keep energy levels steady without the digestive burden of a large meal in the heat.
Salt intake deserves specific attention. The combination of sweating and large water intake depletes sodium quickly. Salty snacks are not just pleasant, they serve a physiological function in preventing hyponatremia. Pretzels, salted nuts, and sodium-forward electrolyte supplements should be deliberately included in your food kit, not just the sweet, high-carbohydrate options that dominate most trail mix selections.
Essential #9: Lighting for Pre-Dawn and Emergency Situations
Experienced canyon hikers start before sunrise, sometimes hours before. The strategy of beginning a summer hike at 4:00 or 5:00 AM is not extreme; it is the approach endorsed by park rangers and seasoned desert hikers as the most effective way to complete inner canyon miles before dangerous heat arrives. This timing makes a quality headlamp a true essential rather than an optional addition.
Headlamp Selection and Carry Strategy
A headlamp rather than a handheld flashlight is the correct choice because it keeps both hands free for trekking poles and balance on technical trail sections. Minimum brightness for pre-dawn canyon hiking should be at least 200 lumens on the primary beam, with a red-light mode for preserving night vision and avoiding disturbing other hikers or wildlife. Bring spare batteries or a USB-rechargeable model with a verified full charge before the hike begins.
Even day hikers who do not plan to hike in the dark should carry a headlamp. Hikes extend longer than planned routinely at the Grand Canyon, and the inner canyon loses direct sunlight well before the sun sets at the rim due to the canyon walls. A hiker caught in the inner canyon after sunset without a light faces genuine hazards on rocky, uneven trail surfaces.
Essential #10: Trekking Poles as Injury Prevention Tools
Trekking poles are among the most consistently underutilized pieces of gear carried to the Grand Canyon and among the most impactful for both performance and injury prevention. The specific biomechanics of canyon hiking make poles more valuable here than on most other trail types.
Why Canyon Descents Demand Pole Support
On a typical canyon descent, the quadriceps muscles are under sustained eccentric load, they are contracting while lengthening to control the rate of descent. This type of muscle work is far more fatiguing and damaging than standard uphill hiking. Without poles to share this load, the quad and knee stress accumulated over a two- to three-hour descent creates significant soreness and instability on the return climb. Studies in sports medicine consistently show that trekking poles reduce lower limb loading during descent by a meaningful margin, reducing injury risk and fatigue.
Poles also provide critical stability on loose scree sections, creek crossings, and the narrow switchbacks of trails like South Kaibab where one side drops sharply away from the trail edge. For hikers carrying heavier backpacks on overnight trips, poles shift some of the load to the upper body and improve balance on uneven terrain.
Collapsible poles that pack down to fit on the side of a daypack are ideal for canyon use, as they can be stowed quickly when the trail widens or when scrambling requires hands. Adjust pole length to shorten for ascent (shorter poles reduce shoulder strain going uphill) and lengthen for descent (longer poles increase the reach needed to brace against steep steps).
Essential #11: Pack Organization and Load Management
How you pack your daypack is nearly as important as what you put in it. Canyon hiking creates specific demands on pack organization that differ from flatland hiking, and poor organization creates safety and comfort problems that compound over the course of a long day.
The Canyon-Optimized Pack Layout
Weight should be centered close to the body and as high in the pack as is comfortable, placing the heaviest items (water reservoir, food) nearest the back panel at shoulder height. This positioning keeps the center of gravity close to the hiker’s own center of mass, reducing the leverage effect that heavy loads create on the lower back and altering balance on narrow or exposed trail sections.
The most critical items, emergency whistle, first aid kit, headlamp, electrolytes, should be accessible from the top lid or a hip belt pocket without removing the pack. In a heat emergency or a sudden weather change, fumbling through a packed bag for essential items wastes time that may matter significantly.
For any hike below the rim, the pack should also include a printed permit (if required for backcountry camping), a written note of your trailhead, expected return time, and emergency contacts left with someone not on the hike. This low-tech safety measure has aided search and rescue operations in the park on multiple occasions.
Pack Weight Targets by Hike Type
| Hike Type | Recommended Pack Weight (Loaded) | Key Weight Drivers |
|---|---|---|
| Rim walk / overlook visit | Under 10 lbs | Water, snacks, jacket, camera |
| Half-day inner canyon day hike | 12–18 lbs | 3L water, food, first aid, sun layers |
| Full-day rim-to-river day hike | 18–25 lbs | 4–5L water, full food supply, PLB, complete first aid |
| Overnight backcountry | 30–45 lbs | Shelter, sleep system, stove, multi-day food and water |
Essential #12: Permits, Passes, and Documentation You Cannot Hike Without
The logistical side of Grand Canyon hiking carries its own set of essentials that are easy to overlook in the excitement of gear planning. Missing the right permit or documentation can end a hike before it starts or result in fines that overshadow the cost of the trip itself.
What Documentation to Carry
The America the Beautiful annual pass, which grants access to all National Park Service sites, represents strong value for any traveler visiting multiple parks or planning to return to the Grand Canyon. The pass covers the vehicle entrance fee for Grand Canyon National Park, which otherwise applies per vehicle for a multi-day period. Keep the pass physically accessible, rangers check it at the entrance gate, not at the trailhead.
Backcountry camping below the rim requires a Grand Canyon backcountry permit, which is managed through a lottery system and is notoriously competitive for popular seasons. Applications open four months before the intended trip month, and demand far exceeds supply for spring and fall dates. Anyone planning an overnight trip below the rim should apply for a permit well in advance and have an alternative day-hike plan ready if the permit is not secured.
Day hikers do not require a backcountry permit for any of the maintained corridor trails (Bright Angel, South Kaibab, North Kaibab). However, group size limits and camping restrictions in certain zones mean that even day hikers on less-traveled trails should review the NPS Grand Canyon day hiking guidelines before departing.
Photographing the canyon from the South Rim overlooks requires no permit. Commercial photography and drone use require separate authorization from the park service, and recreational drone use is prohibited throughout Grand Canyon National Park.
Building Your Grand Canyon Hiking Guide: Season-by-Season Packing Comparison
Consolidating all 12 essentials into a practical, season-aware packing guide makes the planning process significantly more manageable. The table below distills the most important gear variations by season for South Rim day hikers on corridor trails.
| Gear Category | Spring | Summer | Fall | Winter |
|---|---|---|---|---|
| Water capacity | 3L min | 4–5L min ⚠️ | 3L min | 2–3L |
| Sun protection | ✅ Full kit | ✅ Full kit + sun shirt | ✅ Full kit | ✅ Sunscreen + hat |
| Traction devices | ⚠️ March–April | ❌ Not needed | ⚠️ November | ✅ Essential |
| Rain jacket | ✅ Always pack | ✅ Monsoon essential | ✅ Always pack | ✅ Always pack |
| Insulated layer | ⚠️ Fleece vest | ❌ Not needed below rim | ✅ Fleece or light down | ✅ Full insulated jacket |
| Headlamp | ✅ Pre-dawn starts | ✅ Pre-dawn starts essential | ✅ Always pack | ✅ Short daylight hours |
| Electrolytes | ✅ Recommended | ✅ Critical ⚠️ | ✅ Recommended | ⚠️ Carry some |
Grand Canyon Travel Tips: Common Packing Mistakes That Lead to Rescues
The Grand Canyon conducts more search and rescue operations per year than almost any other national park in the United States. A significant portion of these rescues involve hikers who were not reckless, they were simply underprepared in specific, predictable ways. Understanding the most common mistakes is as valuable as knowing what to pack.
Mistake #1: Treating the Descent as the Hard Part
Many first-time canyon hikers exhaust themselves and their water supply on the way down, then realize mid-ascent that they have insufficient reserves for the much harder return climb. The NPS phrase “going down is optional, coming up is mandatory” captures this precisely. The rule of thumb taught by experienced canyon guides is to turn around when you have consumed one-third of your water and food, not one-half. The return trip is longer in both time and effort than the descent, and it happens in the hottest part of the day for hikers who start at a reasonable morning hour.
Mistake #2: Underestimating Time
Trail apps and distance markers do not account for the Grand Canyon’s elevation change, trail surface variability, or the physiological effects of heat on hiking pace. A hike that would take two hours on a flat forest trail takes three to four hours on the equivalent distance below the canyon rim. Building extra time into every plan, and starting earlier than feels necessary, prevents the cascade of problems that comes from running out of daylight.
Mistake #3: Skipping the Shuttle
The South Rim shuttle system is a genuinely useful tool for hikers, particularly for point-to-point hikes that end at a different trailhead than they started. Using the Tusayan shuttle to reach the park can also eliminate the stress of parking during peak season, freeing mental energy for the hike itself and ensuring you arrive at the trailhead fresh rather than frustrated after a long search for a parking spot.
Mistake #4: Ignoring Wildlife Protocols
The Grand Canyon is home to California condors, mule deer, rock squirrels, ringtail cats, and a variety of rattlesnake species. Many visitors are surprised to learn that rock squirrels are responsible for more biting incidents at the canyon than any other animal, they have been hand-fed so often by visitors that they have lost their natural caution. Keep food sealed, do not feed wildlife, and maintain distance from all animals. For more detailed Grand Canyon wildlife watching tips, understanding how to observe animals safely enhances the experience without creating hazards for either party.
Mistake #5: Cotton Clothing in Any Season
Cotton’s role in outdoor recreation has been summarized bluntly by wilderness educators for decades: “cotton kills.” In summer, a cotton shirt absorbs sweat and prevents the evaporative cooling that keeps core temperature manageable. In winter or after rain, a wet cotton layer accelerates heat loss from the body at a rate that can contribute to hypothermia even in temperatures that seem mild. Synthetic or merino wool alternatives are widely available at all price points and make a genuine physiological difference over the course of a canyon day.
Planning Your Visit Through the Grand Canyon Visitor Center
For visitors arriving in Tusayan, Arizona, before entering the park, the Grand Canyon Visitor Center and IMAX theater serves as an ideal first stop for orientation. The IMAX experience, featuring the “Rivers of Time” film, provides geological and cultural context that makes the physical experience of the canyon significantly richer, giving even experienced hikers a deeper appreciation for the layers of time visible in the canyon walls.
The visitor center is also a practical resource for current trail conditions, seasonal updates, and tour booking. Guided experiences, including Pink Jeep Tours, provide access to viewpoints and canyon terrain that independent hikers may not reach safely or efficiently on their own, and guided tours often include safety gear and expert knowledge that supplements personal packing lists. For visitors who want to experience the canyon’s scale and drama from perspectives beyond the maintained hiking trails, a guided jeep tour represents one of the most efficient ways to see multiple viewpoints in a single day.
The center’s Tusayan location is particularly valuable during shoulder seasons and winter, when certain South Rim facilities operate on reduced hours or have seasonal closures, making pre-park orientation more important than during peak summer operation.
Frequently Asked Questions About Grand Canyon Packing and Preparation
How much water should I bring for a Grand Canyon day hike?
The NPS recommends a minimum of one liter of water per hour of hiking in warm conditions. For a half-day hike on a moderate-temperature day, three liters is the minimum. In summer, four to five liters is appropriate for inner canyon hiking, supplemented by electrolyte tablets to prevent hyponatremia from drinking large water volumes without sodium replacement.
What shoes are best for Grand Canyon hiking?
Well-fitted, broken-in hiking shoes or trail runners with aggressive lug soles are appropriate for maintained corridor trails in spring, summer, and fall. Mid-height hiking boots with ankle support are better for off-trail or technical terrain. In winter, add microspike traction devices for icy upper trail sections. Sandals, flip-flops, and flat sneakers are strongly discouraged by the NPS for any hiking below the rim.
Is the Grand Canyon dangerous in summer?
Inner canyon hiking in summer carries genuine heat-related risk. The NPS issues heat advisories and sometimes closes inner canyon trails during peak afternoon hours in July and August. Summer hiking is manageable with proper preparation, very early start times, maximum hydration, electrolyte management, and full sun protection, but it demands more discipline and experience than spring, fall, or winter hiking.
Do I need a permit for day hiking at the Grand Canyon?
Day hikers do not require a permit for corridor trails (Bright Angel, South Kaibab, North Kaibab). Overnight camping below the rim requires a backcountry permit, which is competitive and should be applied for four months in advance through the NPS lottery system. Vehicle entrance to the park requires either payment of the entrance fee or an America the Beautiful annual pass.
What is the best trail for first-time Grand Canyon hikers?
Bright Angel Trail is widely considered the most accessible inner canyon trail for first-time hikers. It has water stations at the 1.5-mile resthouse and at Havasupai Gardens (seasonal), clear mileage markers, shade in morning hours due to its east-facing orientation, and consistent ranger presence. South Kaibab Trail offers more dramatic views but has no water below the rim and less shade, making it more demanding for beginners in warm weather.
What should I wear to the Grand Canyon in winter?
Winter rim temperatures typically range from the mid-teens to the low 40s°F, requiring a proper insulated jacket, moisture-wicking base layers, warm mid-layers, and waterproof or water-resistant outer shells. Microspike traction devices are essential for icy upper trail sections. The inner canyon in winter is significantly warmer than the rim, often reaching pleasant hiking temperatures by mid-morning on clear days.
Can I hike to the Colorado River in one day?
A rim-to-river-and-back day hike is strongly discouraged by the NPS for most visitors. The round trip on Bright Angel Trail to the Colorado River and back is approximately 19 miles with nearly 5,000 feet of elevation change. This is a serious undertaking that requires excellent fitness, extensive desert hiking experience, and careful planning. Many experienced hikers who attempt this return to the rim after dark, dehydrated and exhausted, making it a common source of rescue calls.
What wildlife should I watch out for at the Grand Canyon?
Rattlesnakes are present on canyon trails, particularly on rocky inner canyon sections. They are generally non-aggressive and will move away from trail traffic if given space. Watch where you step and where you place your hands on rocky terrain. Rock squirrels are the most common biting hazard due to habituation from human feeding. California condors, mule deer, and coyotes are commonly sighted and pose no threat when given appropriate distance.
Is the Grand Canyon free to enter?
No. Grand Canyon National Park charges a vehicle entrance fee that covers access for a specified number of days. The America the Beautiful annual pass covers this fee and provides entry to all NPS sites, representing excellent value for travelers visiting multiple parks. Certain days, including some federal holidays, have historically offered free admission to national parks, though these dates change and should be confirmed with the NPS before planning around them.
What is the Grand Canyon packing list for a family with young children?
Families with children should prioritize: child-appropriate sun protection (hats, UPF clothing, sunscreen safe for children), snacks with high frequency of eating to maintain children’s energy levels, a carrier or child pack for young children who may tire on long trail sections, extra water beyond the per-person estimate (children are more susceptible to dehydration), and a clear turnaround plan that does not depend on children’s self-assessment of their own fatigue.
Should I hire a guide for Grand Canyon hiking?
First-time canyon visitors, families with young children, international tourists unfamiliar with desert hiking protocols, and anyone uncertain about trail navigation benefit significantly from guided experiences. Guided jeep tours provide access to multiple viewpoints efficiently and safely, while guided hiking tours offer expert safety knowledge and local trail insight that is difficult to replicate through independent research. The investment in a guide frequently prevents the kind of miscalculations that lead to dangerous situations.
How do I check current Grand Canyon trail conditions before my visit?
The NPS maintains current trail condition reports on the official Grand Canyon National Park website. The Grand Canyon Visitor Center in Tusayan also provides current conditions, seasonal updates, and ranger-sourced information for visitors arriving before entering the park. Conditions can change rapidly due to weather, wildlife activity, and maintenance closures, so checking within 24–48 hours of your intended hike date is the most reliable approach.
Key Takeaways
- Grand Canyon weather by season creates dramatically different packing requirements, there is no universal kit, only season-specific and trail-specific configurations.
- Hydration is the top safety priority: carry more water than you think you need, always include electrolytes, and know your trail’s water availability before you start.
- Footwear is the most consequential single gear choice: match your shoes to the trail, the season, and your experience level, and break them in before arriving.
- The descent is not the hard part: plan your turnaround based on water and food consumed, not distance, and always reserve more than half your resources for the return climb.
- Sun protection goes beyond sunscreen: UPF clothing, wide-brimmed hats, and UV sunglasses are as important as SPF 50+ in the canyon’s high-altitude, reflective environment.
- Navigation and emergency communication gear are non-negotiable for inner canyon hiking where cell service is absent and rescue response times are measured in hours.
- Pre-hike orientation at the Grand Canyon Visitor Center in Tusayan helps visitors calibrate their plans, gear, and expectations to current conditions before entering the park.
- Cotton clothing is dangerous in all seasons: synthetic or merino wool base layers are a genuine safety upgrade, not just a comfort preference.
- Trekking poles reduce injury risk on canyon descents significantly, and their value compounds over longer trails and heavier pack weights.
- Permits and passes are part of the packing list: confirm requirements for your specific trail, hike type, and intended dates well in advance.

About the author
Explore The Canyon Editorial Team
See The Canyon

