
Grand Canyon Rim Trail vs. Inner Canyon Trails: An Honest Comparison for Every Fitness Level
Stand at the South Rim and look down. The trail you choose next will define your entire Grand Canyon experience, whether you’re a first-time visitor with comfortable walking shoes or a seasoned hiker with trekking poles and a hydration pack. The problem most visitors face isn’t a lack of options, it’s that the options look deceptively similar on a park map but deliver wildly different physical demands, scenery payoffs, and logistical challenges.
This guide cuts through the noise. It compares the Grand Canyon Rim Trail against the main inner canyon routes (Bright Angel, South Kaibab, and Hermit) in honest, practical terms, covering everything from elevation change and footing quality to water availability and turnaround strategy. By the end, you’ll know exactly which trail matches your fitness level, your group’s needs, and your available time, without having to learn the hard way at 3,000 feet below the rim.
Understanding the Two Worlds of Grand Canyon Hiking
The Grand Canyon offers two completely different hiking environments that share the same park boundary but almost nothing else. The Rim Trail traces the canyon’s edge at roughly 6,800 feet elevation, staying almost entirely flat and paved. Inner canyon trails descend thousands of feet below the rim into a desert environment where temperatures, terrain, and physical demands change dramatically with every switchback.
This distinction matters more than most visitors realize before arriving. The Grand Canyon trail conditions on the rim and inside the canyon are governed by completely different factors. On the rim, weather is the main variable, with afternoon thunderstorms in summer and ice in winter presenting the main hazards. Inside the canyon, heat becomes the dominant concern in warmer months, with temperatures at the river running 20 to 30 degrees Fahrenheit hotter than at the rim. Add in the physiological reality that every step down is a step you must eventually climb back up at the end of your hike when you’re most fatigued, and you start to understand why the National Park Service consistently warns visitors not to attempt rim-to-river day hikes.
Neither trail type is inherently “better.” They serve different purposes and different visitors. The goal here is to give you an accurate picture of both so you can make a decision you won’t regret on the trail.
The Grand Canyon Rim Trail: Who It’s Really For
The Grand Canyon Rim Trail is one of the most underrated hikes in the American Southwest, not because it’s dramatic in the way inner canyon routes are, but because it delivers extraordinary views with almost no physical barrier to entry. The trail runs approximately 13 miles along the South Rim from Hermits Rest in the west to the South Kaibab Trailhead in the east, passing through Grand Canyon Village at its midpoint.
Roughly 7 miles of the Rim Trail is paved and fully accessible to wheelchairs and strollers. The remaining sections are compacted gravel and dirt with minimal elevation change, rarely varying more than 50 to 100 feet over long stretches. This makes it genuinely suitable for visitors of all mobility levels, including older adults, young children, and people recovering from injuries who still want a meaningful canyon experience.
What the Rim Trail Actually Looks Like
The trail passes through some of the most photographed viewpoints on the South Rim, including Mather Point, Yavapai Point, and Mohave Point. Each viewpoint offers a slightly different angle on the canyon’s depth and width, and the trail between them is scenic enough that the walking itself feels purposeful rather than like a connector between attractions.
The western section of the trail, accessible by the free Grand Canyon shuttle system from Tusayan, runs along the Hermit Road and is closed to private vehicles from roughly March through November. This makes it a genuinely peaceful walk with unobstructed views and minimal traffic noise. The eastern section near the South Kaibab Trailhead tends to be busier but offers dramatic east-facing canyon views that catch morning light particularly well.
Rim Trail Practical Details
- Total length: Approximately 13 miles one way (most visitors walk 2-5 mile segments)
- Elevation change: Minimal, under 200 feet across most sections
- Surface: Paved (7 miles), compacted gravel and dirt (6 miles)
- Water availability: Multiple water stations in Grand Canyon Village; limited on western sections
- Restrooms: Available at major viewpoints and trailheads
- Best for: Families, first-time visitors, seniors, anyone with limited hiking experience
- Time required: 30 minutes to 5+ hours depending on segment chosen
- Shade: Very limited, bring sun protection regardless of season
The Honest Drawbacks
The Rim Trail’s accessibility is also its limitation for visitors seeking a more immersive experience. You are always looking down and across, never surrounded by the canyon walls. The sense of being inside the geology, which inner canyon hikers describe as genuinely transformative, isn’t available from the rim. During peak summer months, the most popular viewpoints can feel crowded, and the paved sections near Grand Canyon Village see heavy foot traffic throughout the day.
For visitors who want more than a view from above but aren’t ready for a full inner canyon descent, the first mile of Bright Angel Trail (described below) can be combined with a Rim Trail walk for a taste of both worlds without committing to a serious elevation change.
Bright Angel Trail: The Most Forgiving Inner Canyon Route
Bright Angel Trail is the most popular inner canyon trail at the South Rim, and for good reason. It’s the most logistically forgiving of the major descents, with multiple turnaround options, seasonal water availability, and shade from overhanging cliffs in its upper sections. If you’re going to hike into the canyon for the first time, this is the trail to choose.
The trail descends from the trailhead near Bright Angel Lodge in Grand Canyon Village, dropping roughly 3,060 feet over 4.6 miles to the Colorado River. The gradient is steady rather than brutal, and the switchbacks in the upper section are well-constructed and relatively wide. The trail was originally a Native American route, later improved by the Havasupai and then developed by the Santa Fe Railway in the early 1900s, which is why it follows the natural fault line through the canyon walls more smoothly than trails that were engineered from scratch.
Turnaround Options That Actually Work
What makes Bright Angel particularly valuable for this comparison is its layered turnaround structure. Most day visitors should pick one of these targets and stick to it:
- 1.5-Mile Resthouse (1,131 ft descent): Suitable for most fitness levels. Seasonal water (May through September) and emergency phones available. Round trip: 3 miles, 2-3 hours.
- 3-Mile Resthouse (2,112 ft descent): Suitable for hikers with some trail experience. Year-round water and toilets available. Round trip: 6 miles, 4-6 hours.
- Indian Garden (3,060 ft descent, 4.6 miles): Currently undergoing a name transition to Havasupai Gardens per NPS. Year-round water and shade. A serious half-day commitment for fit hikers. Round trip: 9.2 miles, 6-9 hours.
- Colorado River (4.6 miles from Indian Garden): Overnight permit required for practical purposes. Not a realistic day hike for most visitors.
The critical mistake visitors make on Bright Angel is hiking past their comfortable turnaround point because the descent feels easy. The climb back up, particularly in afternoon heat, is where heat exhaustion and rescue situations develop. The NPS performs hundreds of rescues on this trail annually, the majority of which involve hikers who underestimated the return climb.
Bright Angel Trail Conditions to Know
The upper sections of Bright Angel can be icy and dangerous from late November through March. Microspikes are strongly recommended during winter months and are available at gear stores in Tusayan and at the park. Summer hiking should begin before 7 AM to avoid the hottest hours, and the 3-Mile Resthouse should be treated as the absolute maximum turnaround for a summer day hike without overnight gear.
South Kaibab Trail: The Most Dramatic Descent
If Bright Angel is the practical choice, South Kaibab Trail is the spectacular one. The best hikes Grand Canyon South Rim lists almost always feature South Kaibab prominently because its ridge-top routing delivers panoramic views that no other trail can match. You’re not walking along a canyon wall; you’re descending a spine of rock with open exposure on both sides, with the full depth of the canyon visible in every direction.
The trade-off is significant. South Kaibab has no water, no shade, and no bailout options below the rim. The trail drops 4,780 feet over 6.7 miles to the Colorado River, with a steeper average gradient than Bright Angel. There are no resthouses with emergency phones until Bright Angel Campground near the river. The trail surface is excellent, well-maintained and clear, but the relentlessness of the descent and the total absence of water make it a trail that punishes underprepared visitors more severely than any other South Rim route.
Day Hiking South Kaibab Responsibly
The NPS recommends Ooh Aah Point (0.9 miles, 640 ft descent) and Cedar Ridge (1.5 miles, 1,140 ft descent) as day hike turnaround targets. Cedar Ridge in particular offers a genuinely stunning payoff, with unobstructed views across the Tonto Platform and the inner gorge far below, for a moderate effort that most reasonably fit visitors can manage.
Skeleton Point (3 miles, 2,040 ft descent) is the maximum recommended day hike turnaround on South Kaibab, and only for experienced hikers in good physical condition during cooler months. Attempting to hike to the river and back in a single day on South Kaibab without overnight permits is not recommended and has resulted in numerous rescues and fatalities.
South Kaibab is best hiked as a descent route in an overnight itinerary, pairing with Bright Angel as the ascent route on a classic South Rim corridor hike. This combination is widely considered one of the finest overnight hiking experiences in the American Southwest.
Hermit Trail: The Route for Experienced Hikers Who Want Solitude
Hermit Trail offers something neither Bright Angel nor South Kaibab can: genuine solitude. Located at Hermits Rest, the western terminus of the Rim Trail, Hermit Trail is a maintained but unmaintained-feeling route that sees a fraction of the foot traffic of the corridor trails. It was originally built by the Santa Fe Railway as an alternative to Bright Angel (which was then a toll trail), and it retains a wilder, less managed character than its more famous counterparts.
The trail descends 4,240 feet over 8.9 miles to the Colorado River, passing through multiple geological formations including the Hermit Shale, Supai Group, and Redwall Limestone. The route is more technically demanding than either corridor trail, with loose rock in sections, more exposure, and no water until Santa Maria Spring at 2.5 miles (which must be treated before drinking). The trail beyond Santa Maria Spring deteriorates further, with cairn-marked sections replacing the clear tread of the upper route.
Who Should Hike Hermit Trail
Hermit Trail is appropriate for experienced desert hikers who are comfortable with route-finding, carry sufficient water and navigation tools, and have prior inner canyon experience. It’s not a trail for first-time canyon visitors regardless of general fitness level. The lack of other hikers means help is farther away in an emergency, and the technical sections require genuine trail competence.
For the right visitor, Hermit Trail delivers an experience that feels closer to backcountry wilderness than the corridor trails. The upper sections offer views back toward the South Rim that few visitors ever see, and the relative quiet makes the geological storytelling of the canyon walls easier to absorb at a contemplative pace.
Trail-by-Trail Comparison: The Full Picture
| Feature | Rim Trail | Bright Angel | South Kaibab | Hermit Trail |
|---|---|---|---|---|
| Total Length | 13 mi (one way) | 9.2 mi (river RT) | 13.4 mi (river RT) | 17.8 mi (river RT) |
| Elevation Change | Under 200 ft | 4,380 ft (river) | 4,780 ft (river) | 4,240 ft (river) |
| Water Available | ✅ Village area | ✅ Seasonal/year-round | ❌ None on trail | ⚠️ Treat required |
| Shade | ❌ Very limited | ⚠️ Partial upper sections | ❌ None | ⚠️ Partial |
| Crowd Level | High (viewpoints) | Very High | High | Low |
| Suitable for Families | ✅ Yes | ⚠️ First 1.5 mi only | ⚠️ Ooh Aah Point only | ❌ Not recommended |
| Overnight Permit Required | ❌ No | ✅ Below Indian Garden | ✅ Below Skeleton Point | ✅ Any overnight |
| Technical Difficulty | Very Easy | Moderate | Moderate–Strenuous | Strenuous |
| Wheelchair Accessible | ✅ Partial (7 mi paved) | ❌ No | ❌ No | ❌ No |
| Best Season | Year-round | Spring/Fall/Winter | Spring/Fall/Winter | Spring/Fall |
How to Match Your Fitness Level to the Right Trail
One of the most common planning mistakes visitors make is using general fitness as the primary guide for trail selection at the Grand Canyon. Regular gym-goers and even experienced hikers from other regions are frequently surprised by how differently the canyon’s demands register in their bodies. The combination of altitude at the rim, desert heat in the canyon, and the unavoidable uphill return creates a set of conditions that requires honest self-assessment rather than general fitness confidence.
The framework below is designed around specific, honest criteria rather than vague fitness categories. Use it to make a realistic decision before you’re standing at a trailhead.
The Grand Canyon Trail Selection Framework
| Your Situation | Recommended Trail | Target Turnaround | Time Required |
|---|---|---|---|
| First visit, mixed group, children or seniors present | Rim Trail | Any viewpoint, shuttle back | 1–4 hours |
| Moderate fitness, want canyon immersion, summer visit | Bright Angel | 1.5-Mile Resthouse | 2–3 hours |
| Good fitness, spring or fall visit, want best views | South Kaibab | Cedar Ridge | 2–3 hours |
| Strong fitness, cooler months, want deeper canyon day hike | Bright Angel | 3-Mile Resthouse | 4–6 hours |
| Very fit, experienced hiker, overnight permit secured | South Kaibab down / Bright Angel up | Bright Angel Campground or Phantom Ranch | 1–2 days |
| Experienced backcountry hiker, seeking solitude, spring/fall | Hermit Trail | Santa Maria Spring or beyond with permit | Full day or overnight |
| Wheelchair user or limited mobility | Rim Trail (paved sections) | Mather Point to Yavapai Point | 1–2 hours |
Seasonal Grand Canyon Trail Conditions: What Changes by Month
Understanding how Grand Canyon trail conditions shift across seasons is essential for planning a safe and enjoyable hike. The canyon’s climate is not uniform, it operates as multiple climate zones stacked vertically, and the season you visit dramatically changes which trails are appropriate and what preparation you need.
Spring (March through May)
Spring is widely regarded as the best season for inner canyon hiking. Temperatures at the rim range from the 40s to 70s Fahrenheit, and the canyon floor stays below 90°F for most of the season. Water sources on Bright Angel are fully operational, wildflowers appear on the Tonto Platform in April and May, and the trail surfaces are generally clear of ice by mid-March. This is the ideal window for ambitious day hikes to the 3-Mile Resthouse or beyond, and for overnight corridor hikes.
The main spring challenge is unpredictable weather. Afternoon thunderstorms can arrive quickly from late April onward, and trail surfaces can become slippery. Start early and be off exposed ridges (particularly South Kaibab) by early afternoon.
Summer (June through August)
Summer is the most visited season at the Grand Canyon but the most dangerous for inner canyon hiking. Temperatures at the canyon floor regularly exceed 110°F in July and August, and the combination of heat, sun exposure, and physical exertion creates genuine heat stroke risk even for fit, experienced hikers. The NPS explicitly advises against hiking below the rim between 10 AM and 4 PM during summer months.
Summer is an excellent season for the Rim Trail, which benefits from the altitude’s cooler temperatures and afternoon breezes. Rim sunsets in summer are spectacular, with monsoon cloud formations creating dramatic light over the canyon. For inner canyon hiking in summer, the 1.5-Mile Resthouse on Bright Angel is a reasonable target if you start before sunrise and carry at least one liter of water per hour of hiking.
Fall (September through November)
Fall rivals spring as the best inner canyon hiking season. Temperatures cool progressively through October and November, monsoon season ends in mid-September, and the canyon takes on a different quality of light as the sun angle lowers. Trail surfaces are dry and stable, and crowd levels drop noticeably after Labor Day, making this an excellent time to tackle South Kaibab to Cedar Ridge or Skeleton Point.
Winter (December through February)
Winter hiking at the Grand Canyon is genuinely rewarding for prepared visitors. Snow on the rim creates extraordinary photographic conditions, and the inner canyon stays relatively mild (40–60°F at the river) when the rim is cold. Microspikes are essential for the upper sections of all inner canyon trails from November through March, as icy switchbacks are a serious fall hazard. Water sources at the 3-Mile Resthouse remain operational year-round, making Bright Angel the clear choice for winter inner canyon hikes.
The Rim Trail in winter offers its own appeal, particularly at sunrise when snow and ice on the canyon walls catch the low angle light. Dress in layers and be prepared for wind at exposed viewpoints.
Things to Do at the Grand Canyon Beyond Hiking
Hiking is the centerpiece of most South Rim visits, but the things to do at the Grand Canyon extend well beyond trail time. For many visitors, the combination of a canyon hike with complementary experiences creates a richer overall trip than hiking alone would deliver, and some of the most memorable Grand Canyon moments happen before you ever reach the trailhead.
Start Your Visit at Grand Canyon Visitor Center IMAX
Located in Tusayan just outside the South Rim entrance gates, Grand Canyon Visitor Center IMAX offers a genuinely useful orientation experience before you enter the park. The flagship film, “Grand Canyon: Rivers of Time,” screens on a six-story IMAX screen using IMAX with Laser technology, covering the geological and cultural history of the canyon in a way that makes the rocks and formations you’ll see on the trail dramatically more meaningful.
Watching the film before your hike is particularly valuable for visitors who aren’t geologists or natural history enthusiasts. When you descend Bright Angel Trail and pass through the Kaibab Limestone, Toroweap Formation, Coconino Sandstone, and Hermit Shale, you’ll have a visual and narrative framework that transforms the canyon walls from abstract scenery into a readable geological record spanning nearly two billion years. Book IMAX tickets online and save 20% compared to at-the-door pricing.
The facility also sells various National Park entrance passes on-site, which can save significant time at the South Entrance gates during peak periods. Pink Jeep Tours, recognized as Best Tour Operator, maintains its office at Grand Canyon Visitor Center IMAX, with guided tours departing directly from the front door. Every Pink Jeep Tour originating from Grand Canyon Visitor Center IMAX includes a ticket to “Grand Canyon: Rivers of Time,” making it an efficient combination for visitors who want guided canyon access alongside their independent hiking plans.
Ranger Programs and Geology Talks
The NPS offers free ranger-led programs at multiple South Rim locations throughout the day, covering everything from geology and wildlife to the human history of the canyon. These programs are particularly valuable for first-time visitors and families, and they operate year-round (with reduced frequency in winter). Check the Grand Canyon National Park events calendar for current program schedules and locations before your visit.
Sunrise and Sunset Viewpoints
The South Rim’s east-facing viewpoints (Mather Point, Yavapai Point, Desert View) catch sunrise light dramatically, while the west-facing viewpoints along Hermit Road (Mohave Point, Hopi Point) are the premier sunset destinations. Both experiences are free, require no physical effort beyond getting to the viewpoint, and represent some of the most visually stunning moments available anywhere in the American Southwest. Arrive at least 30 minutes before the actual rise or set time to secure a good position, particularly during summer and holiday weekends.
Guided Jeep Tours
For visitors who want canyon access without the physical demands of hiking, Pink Jeep Tours departing from Grand Canyon Visitor Center IMAX provide guided access to key South Rim viewpoints and canyon perspectives with expert narration. This is particularly useful for visitors with mobility limitations, families with very young children, or anyone who wants to cover significant ground efficiently without a full hiking commitment.
Safety Essentials for Every Fitness Level
The Grand Canyon’s rescue statistics reflect a consistent pattern: the majority of serious incidents involve visitors who were adequately fit but inadequately prepared. Physical fitness is not the same as canyon-specific preparation, and this distinction is worth understanding before you lace up your boots.
The Ten Non-Negotiable Safety Principles
- Water is your first priority. Carry at least one liter per hour of hiking in warm conditions, more in summer. Thirst is a lagging indicator of dehydration at altitude and in heat; drink before you feel thirsty.
- Food matters as much as water. Salty snacks help retain the water you drink. Hyponatremia (dangerously low sodium from drinking too much water without electrolyte replacement) has caused deaths on the Bright Angel Trail.
- Turn around at half your water, not half your planned distance. The climb out takes significantly longer than the descent, and heat increases in the canyon as the day progresses.
- Tell someone your plan. Leave your itinerary, expected return time, and vehicle description with someone not on the hike before you descend.
- Sun protection is not optional. UV exposure at 6,800 feet elevation is significantly higher than at sea level, and the canyon’s reflective walls amplify it further. Sunscreen, a hat with a brim, and sun-protective clothing are essential regardless of season.
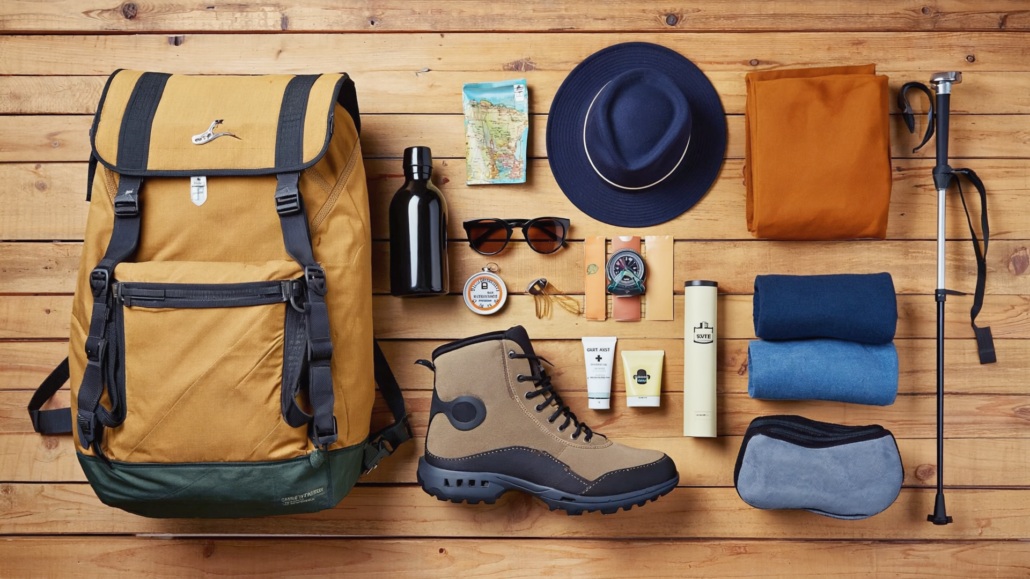
- Footwear determines your confidence. Trail-specific hiking shoes or boots with ankle support and grippy soles make a meaningful difference on loose rock and steep switchbacks. Sandals and flip-flops cause more inner canyon rescues than any other footwear category.
- Check trail conditions before departing. The NPS updates trail conditions and closures at the Grand Canyon trail closures page. Rock falls, washouts, and seasonal closures do occur.
- Know the symptoms of heat exhaustion. Heavy sweating, cold clammy skin, weakness, dizziness, and nausea are early warning signs. Move to shade immediately, drink water with electrolytes, and rest before continuing. Heat stroke (hot dry skin, confusion, loss of consciousness) is a medical emergency requiring immediate evacuation.
- Microspikes in winter. Icy switchbacks on all inner canyon trails have caused serious falls. Bring microspikes between November and March and put them on before you think you need them.
- Respect your body’s signals on altitude. The South Rim sits at 6,800 feet. Visitors arriving from sea level can experience mild altitude effects including headache, fatigue, and reduced exercise tolerance for the first 24–48 hours. Factor this into your planning if you’re arriving and hiking the same day.
Planning Your Grand Canyon Hiking Day: A Practical Itinerary Framework
A well-structured Grand Canyon visit day looks different depending on your trail choice, but the timing principles apply universally. The following framework is organized around the realities of canyon heat, crowd patterns, and park logistics rather than ideal conditions.
Sample Day Structure for a First-Time South Rim Visitor
Before entering the park: Stop at Grand Canyon Visitor Center IMAX in Tusayan to watch “Grand Canyon: Rivers of Time,” purchase your park entrance pass, and pick up any last-minute gear from the retail store. This stop adds 60–90 minutes to your pre-park time but delivers orientation context that significantly improves the quality of everything that follows. Start your Grand Canyon adventure with IMAX before the crowds build at the rim.
Early morning (7–11 AM): This is your prime hiking window. Park at one of the designated lots near Grand Canyon Village (arrive before 9 AM in summer or you may not find parking), and begin your chosen trail as early as possible. The inner canyon is coolest, the light is best for photography, and trail traffic is at its lowest.
Midday (11 AM–2 PM): Return from your inner canyon hike or walk the Rim Trail between viewpoints. Avoid descending into the canyon during these hours in summer. Use the time for lunch, ranger programs, or shuttle-accessible viewpoints along Hermit Road.
Afternoon (2–5 PM): Desert View Drive to the east offers excellent viewpoints with significantly lighter traffic than the main Village area. The Watchtower at Desert View (25 miles east of the Village) provides a different canyon perspective and is worth the drive.
Evening (5 PM–sunset): Position yourself at Hopi Point or Mohave Point for sunset. These are the South Rim’s best sunset viewpoints, accessible by the free Hermit Road shuttle. Arrive at least 30 minutes before sunset. The light show that follows as the canyon walls cycle through amber, red, and deep shadow is genuinely one of the most spectacular natural light displays in North America.
A Decision Guide for Every Visitor Type
After reviewing all the trail options, conditions, and seasonal factors, the path forward depends on your specific situation. Here’s a direct, opinionated recommendation for each visitor type without hedging.
If you’re visiting with young children (under 10): Stay on the Rim Trail. The paved sections between Mather Point and Yavapai Point deliver genuinely dramatic views with zero safety risk, and the free shuttle system means you can cover significant distance without anyone getting tired. Add the first half-mile of Bright Angel as a “real trail” experience if the kids want to step off the rim, then turn around at the first switchback set.
If you’re a first-time adult visitor with average fitness: Combine the Rim Trail for morning viewing with a Bright Angel descent to the 1.5-Mile Resthouse. You’ll get both the overview perspective and the immersive inner canyon experience in a single day, and you’ll finish the hike before afternoon heat builds in summer or before your legs give out in any season.
If you’re a fit hiker visiting in spring or fall: South Kaibab to Cedar Ridge in the morning is the single best day hike on the South Rim for views-per-effort. The panoramic exposure on the ridge is unlike anything available from the rim or on Bright Angel, and Cedar Ridge is a satisfying destination that rewards the descent without requiring a punishing climb back.
If you want the deepest possible day hike experience: Bright Angel to the 3-Mile Resthouse in cool weather is the maximum responsible single-day inner canyon experience for most visitors. Start no later than 7 AM, carry 3+ liters of water, eat salty snacks throughout, and allow 5–7 hours total including rest time at the Resthouse.
If you’re planning an overnight: Secure your Grand Canyon backcountry permit well in advance (permits for popular dates sell out months ahead), and plan the classic corridor loop: descend South Kaibab, spend the night at Bright Angel Campground or Phantom Ranch, and ascend via Bright Angel. This combination is the definitive Grand Canyon hiking experience and is genuinely transformative for those who complete it.
If you have limited mobility or accessibility needs: The paved Rim Trail between Mather Point and Yavapai Point is fully accessible and provides spectacular canyon views from multiple angles. The NPS Grand Canyon accessibility guide covers all accessible routes, parking, and facilities in detail.
Frequently Asked Questions About Grand Canyon Trails
Is the Grand Canyon Rim Trail difficult?
The Rim Trail is one of the easiest trails at the Grand Canyon. The paved sections between Mather Point and Yavapai Point are virtually flat and accessible to wheelchairs and strollers. The unpaved western sections have slightly more variation but remain suitable for most fitness levels. The main challenge is sun exposure and wind at viewpoints, not physical difficulty.
How far should a beginner hike into the Grand Canyon?
The 1.5-Mile Resthouse on Bright Angel Trail is the recommended first inner canyon target for beginners. It involves a 1,131-foot descent over 1.5 miles and provides a genuine inner canyon experience without committing to a distance that becomes dangerous on the return. Most reasonably fit adults can complete this round trip in 2–3 hours.
Can you hike to the bottom of the Grand Canyon in one day?
Technically possible but strongly discouraged by the NPS for most visitors. The round trip to the Colorado River via Bright Angel is approximately 18 miles with 4,380 feet of elevation change. The descent is deceptively easy; the return climb in afternoon heat is where serious health emergencies occur. An overnight permit is the recommended approach for anyone wanting to reach the river.
What is the best hike for a first-time Grand Canyon visitor?
For a balanced first visit experience, combine the Rim Trail at Mather Point for an overview perspective with a short Bright Angel descent to the first tunnel (about 0.5 miles). This gives you both the rim panorama and the experience of being inside the canyon without significant physical risk. Add the 1.5-Mile Resthouse as a target if your fitness level supports it.
What are the best hikes on the Grand Canyon South Rim for families?
The Rim Trail between Mather Point and Yavapai Point is the top family recommendation, with the free shuttle system allowing flexible distances. For families with older children (10+) who want a trail experience, Bright Angel to the first resthouse in spring or fall offers manageable challenge with water and restroom facilities along the way.
When should I check Grand Canyon trail conditions?
Check trail conditions on the NPS website within 48 hours of your planned hike. Rock fall events, seasonal closures, and water source outages can affect trail safety and logistics. Winter conditions (ice, snow) can change rapidly, and the NPS updates their trail status page as conditions develop.
Is South Kaibab or Bright Angel better for a day hike?
Depends on your priorities. South Kaibab delivers superior views due to its open ridge routing but has no water or shade, making it riskier in warm weather. Bright Angel has water stations and partial shade, making it more forgiving for longer descents and summer visits. For view quality alone, South Kaibab wins. For safety margin and flexibility, Bright Angel wins.
Do I need a permit to hike the Rim Trail?
No permit is required for the Rim Trail or for day hikes on any South Rim trail. A park entrance fee applies to all visitors entering Grand Canyon National Park. Overnight camping below the rim on any trail requires an advance backcountry permit from the NPS Backcountry Information Center.
What should I wear hiking at the Grand Canyon?
Moisture-wicking base layers, a sun-protective long-sleeve shirt, a wide-brimmed hat, and trail-specific hiking shoes or boots with ankle support are the foundation. Avoid cotton, which retains sweat and can accelerate both overheating and cooling. Gaiters are useful on dusty inner canyon trails. Bring a light windproof layer for rim hiking in any season, and a warm mid-layer for winter visits.
Where can I buy hiking gear near the Grand Canyon South Rim?
Grand Canyon Visitor Center IMAX in Tusayan, located just outside the South Rim entrance gates, carries a large souvenir and hiking gear retail store where you can pick up last-minute essentials including sunscreen, hydration supplies, and basic trail gear before entering the park. This is significantly more convenient than backtracking after you’ve already entered.
Is the Grand Canyon Rim Trail open year-round?
Yes. The Rim Trail is open year-round. In winter, some paved sections may have ice or snow, and the western Hermit Road sections can be icy. The free shuttle system continues operating year-round with adjusted schedules in winter. Always check the NPS website for current conditions before visiting in winter months.
How do I get to the Grand Canyon South Rim from Tusayan?
Tusayan is approximately 1 mile south of the South Entrance to Grand Canyon National Park on Highway 64. Driving takes approximately 5 minutes from Tusayan to the South Entrance gates. A free seasonal shuttle also connects Tusayan to Grand Canyon Village, which is a useful option during peak season when in-park parking is limited.
Key Takeaways for Planning Your Grand Canyon Hike
- The Grand Canyon Rim Trail is suitable for all fitness levels and all ages. It’s genuinely spectacular and should not be dismissed as a “consolation” hike. For many visitors, it delivers exactly the right level of experience without physical risk.
- Bright Angel Trail is the best inner canyon choice for first-time canyon hikers. Its layered turnaround structure, water availability, and partial shade make it the most forgiving descent route on the South Rim.
- South Kaibab Trail offers the best views of any South Rim trail from Cedar Ridge onward, but its lack of water and shade makes it a trail where preparation is non-negotiable. Cedar Ridge is the ideal day hike target.
- Hermit Trail is for experienced backcountry hikers who know what they’re doing. Its rewards are real, but its margin for error is smaller than the corridor trails.
- Season matters enormously. Spring and fall are the best seasons for inner canyon hiking. Summer inner canyon hiking requires a very early start and conservative turnaround targets. Winter is underrated and often spectacular with the right preparation.
- Start at Grand Canyon Visitor Center IMAX in Tusayan before entering the park. The IMAX film orientation, gear retail, park pass purchase, and Pink Jeep tour booking all happen in one stop, setting you up for a significantly better day than arriving at the rim cold.
- Overnight permits are required for camping below the rim and sell out months in advance. Plan accordingly if a river-level experience is your goal.
- Physical fitness is necessary but not sufficient. Canyon-specific preparation, including heat management, hydration strategy, and honest turnaround discipline, determines whether your hike is memorable for the right reasons.

About the author
Explore The Canyon Editorial Team
See The Canyon

