
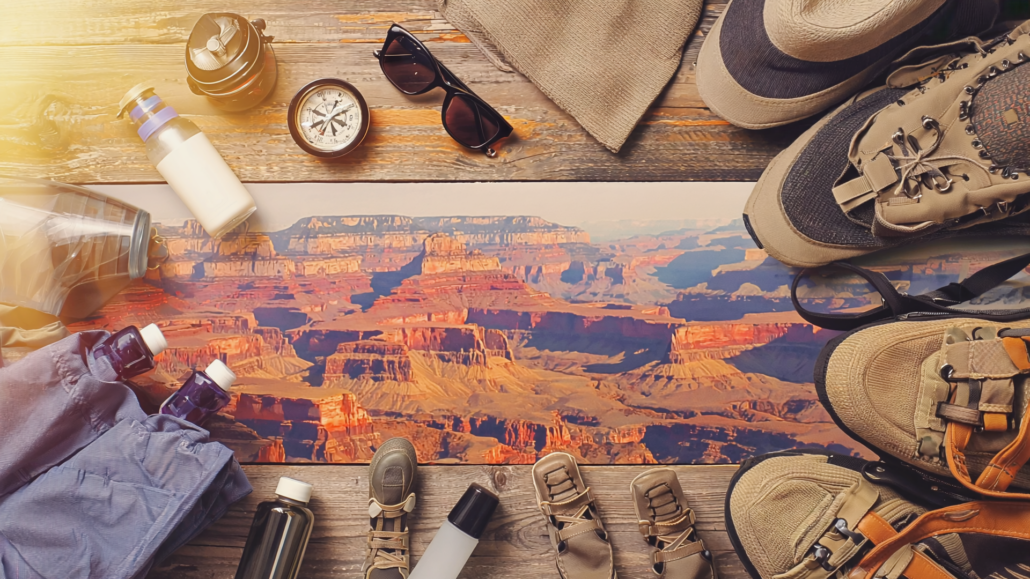
Grand Canyon Packing Science: How Elevation, Heat, and Microclimate Changes Drive Every Item on Your List
Most hikers approach packing for the Grand Canyon the same way they’d pack for any other trail: sunscreen, water, snacks, sturdy shoes. That checklist works fine for a flat state park. At the Grand Canyon, it can get you into serious trouble. The canyon is not simply a very big hole with a trail at the bottom. It is a stacked system of radically different environments, each with its own temperature range, humidity level, wind exposure, and physical demands. What you pack, and why you pack it, needs to reflect that complexity. This article breaks down the actual science behind Grand Canyon packing decisions, explaining how elevation changes, heat inversions, and microclimate shifts translate directly into the gear on your back.
Why the Grand Canyon Defies Normal Hiking Logic
The core challenge of packing for the Grand Canyon is that it violates one of the most reliable assumptions hikers carry into the backcountry: altitude equals cold. In almost every other mountain or canyon environment, you ascend to reach the cold zones and descend to warmth. At the Grand Canyon, you do the opposite. You begin your hike at the cool, forested rim and descend into intensifying heat as you drop toward the Colorado River at the canyon floor.
This inversion creates a packing paradox that catches first-time visitors off guard. Leaving the South Rim trailhead on a crisp morning, many hikers dress for the ambient rim temperature, which sits around 7,000 feet above sea level. That temperature can be 20 to 30 degrees Fahrenheit cooler than what they will encounter at the canyon’s inner gorge. As they shed layers and stow cold-weather gear, they move deeper into a radically hotter, drier, and more physically demanding environment. And then they have to climb back out of it, often during the hottest part of the afternoon, with legs that have already absorbed several miles of descent.
The National Park Service describes this as the “upside-down mountain” problem, and it is the single most important concept shaping a smart Grand Canyon packing list. Every item you choose should account for this directional heat gradient: you need gear that manages cold at the top, extreme heat at the bottom, and the physiological demands of hauling yourself back up through both zones. Understanding this inversion is not just an interesting geological footnote. It is the foundation of sound Grand Canyon trail planning.
What makes this even more complex is the canyon’s layered microclimate system. The rim, the Tonto Plateau (the broad shelf roughly 3,000 feet below the rim), and the inner gorge are not just different in temperature. They differ in humidity, wind patterns, sun exposure, and the radiant heat bouncing off canyon walls. Each zone demands a different physiological response, and your gear needs to support all three without weighing you down on the climb out.
How Elevation Drop Changes Everything About Temperature Management
The South Rim sits at approximately 6,860 feet above sea level. The Colorado River at the canyon floor sits at roughly 2,480 feet. That is a descent of more than 4,300 feet over a relatively short horizontal distance, which is a steeper elevation change than many full-day mountain hikes. This vertical drop drives temperature differences that can reach 25°F or more between the rim and the river, and those differences are not evenly distributed across the trail.
The upper third of most South Rim trails, including the Bright Angel and South Kaibab, passes through Kaibab limestone and Coconino sandstone formations that sit in open exposure to prevailing winds. Mornings here can be genuinely cold, particularly from October through April, when rim temperatures can hover near freezing at dawn even while the calendar shows spring or fall. A lightweight insulating layer or packable down jacket is not optional for early-morning starts in these months. It is essential.
As you descend through the Redwall limestone and into the Tonto Platform, the environment shifts dramatically. Rock walls begin to channel and concentrate solar radiation. Wind diminishes. The open, reflective surface of the Tonto Plateau creates what is effectively a solar oven during summer months, with surface temperatures on exposed rock sometimes exceeding air temperature by 20 or more degrees. The National Park Service heat safety guidelines for Grand Canyon note that inner canyon temperatures regularly exceed 110°F between June and August, and the combination of radiant heat from canyon walls and direct sun exposure accelerates dehydration far faster than hikers anticipate.
Below the Tonto Plateau, the trail drops into the Vishnu schist of the inner gorge, the oldest exposed rock in the canyon. This narrow corridor between towering dark walls creates an intensely hot microenvironment with limited air movement. The dark schist absorbs and radiates heat with exceptional efficiency. This is the zone where heat exhaustion and heat stroke risks peak, and it is also the zone where many hikers make the mistake of pushing forward when they should be resting and hydrating.
For packing purposes, this elevation profile means you need clothing that handles a 30-degree temperature swing within a single hike. Moisture-wicking base layers that perform well in both cool morning air and midday heat are not a luxury. They are the practical solution to a real physiological challenge. Avoid cotton entirely. Cotton holds moisture, loses insulating value when wet, and accelerates both chilling at the rim and overheating in the inner canyon.
Grand Canyon Weather by Season: A Zone-by-Zone Breakdown
Grand Canyon weather by season is frequently misunderstood because visitors apply rim-level forecasts to their entire hike. A rim forecast of 65°F feels like perfect hiking weather. That same day, the inner canyon may be pushing 95°F or higher. Planning your packing list requires understanding both zones simultaneously, not just the temperature shown in a standard weather app.
| Season | South Rim Temp Range | Inner Canyon Temp Range | Primary Packing Consideration | Trail Conditions |
|---|---|---|---|---|
| Summer (Jun–Aug) | 70–85°F | 100–115°F+ | ⚠️ Heat management is paramount; dawn starts mandatory | Dry, dusty; afternoon monsoon storms possible; flash flood risk in slot areas |
| Fall (Sep–Nov) | 45–75°F | 75–95°F | ✅ Layering flexibility; widest gear range needed | Generally excellent; early frost possible at rim in November |
| Winter (Dec–Feb) | 20–45°F | 40–65°F | ❌ Ice and snow on upper trails; microspikes essential | Ice on switchbacks; icy rim trail sections; river corridor mild and pleasant |
| Spring (Mar–May) | 40–70°F | 60–90°F | ✅ Ideal layering window; wind and rain possible | Variable; snowmelt can affect upper trails through April; wildflowers below rim |
Summer demands the most aggressive heat management strategy. The NPS recommends hiking only before 10 a.m. and after 4 p.m. during summer months, which means your gear needs to support a pre-dawn start. A headlamp is not a nice-to-have in summer. It is how you get your miles in safely. Similarly, the water carry requirements in summer are higher than most hikers expect, with the NPS recommending at least one liter of water per hour of hiking in peak heat conditions.
Winter hiking is perhaps the most underestimated scenario. The inner canyon in winter is genuinely pleasant, with mild temperatures and dramatically reduced crowds. But the upper trails can be treacherous. Ice forms on the switchbacks of Bright Angel and South Kaibab trails and can persist for days after a storm. Microspikes or traction devices are essential from December through March for anyone planning to descend below the rim. Many visitors arrive without them and are turned back at the trailhead or, worse, attempt the descent unprepared.
The Water Science: Why Standard Hydration Rules Don’t Apply Here
Hydration is the most critical and most frequently miscalculated element of Grand Canyon packing. The canyon’s environment creates a perfect storm of dehydration drivers: extreme heat, low humidity, high physical exertion, and altitude effects that suppress thirst cues. Hikers who drink when they feel thirsty are already behind. By the time your body signals thirst at canyon temperatures, you may have already lost a meaningful percentage of your body’s water volume.
The desert air of the inner canyon is exceptionally dry. Moisture evaporates from exposed skin and from your respiratory tract with each breath, often without the visible sweating that alerts hikers in humid environments. This “insensible water loss” is a major factor in Grand Canyon rescues. Visitors from humid states often underestimate how fast they are losing fluids because they don’t feel as wet as they would on a humid-climate hike of equal intensity.
Electrolyte replacement is equally important and equally underestimated. Drinking large quantities of plain water without replacing lost sodium, potassium, and magnesium creates a condition called hyponatremia, a dangerous drop in blood sodium levels that can cause nausea, confusion, and in severe cases, life-threatening complications. The NPS explicitly warns against drinking water alone on strenuous canyon hikes and recommends salty snacks and electrolyte supplements alongside fluid intake. This is not an edge case. Hyponatremia-related rescues occur at the Grand Canyon, particularly among well-intentioned hikers who bring plenty of water but no electrolytes.
For packing purposes, this means your water system needs to be both high-capacity and reliable. A 3-liter hydration reservoir is a reasonable minimum for most inner-canyon day hikes in warm weather. Collapsible water bottles add backup capacity without significant weight. Water filtration or purification capability matters for longer hikes where creek or river sources may be the only option. And a full supply of electrolyte packets or tablets should be treated as non-negotiable, not optional.
Water availability along the trail changes by season and by trail. Bright Angel Trail has water available at Indian Garden (now called Havasupai Gardens) and at the trailhead, but these sources are sometimes shut off in winter. South Kaibab has no water below the rim. Knowing the water availability map of your specific trail before you pack is essential, and the NPS water availability page for Grand Canyon is the authoritative source for current conditions.
Footwear and Traction: The Most Consequential Gear Decision You’ll Make
No single item on a Grand Canyon packing list has more impact on hiker safety and enjoyment than footwear. And no item is more frequently chosen incorrectly. The trail surface changes dramatically across the canyon’s elevation zones, and footwear that performs well in one zone can be actively dangerous in another.
The upper switchbacks of most South Rim trails are paved or compacted gravel on a steep grade. This is the zone where ankle support and traction on loose material matter most. A low-cut trail runner that works beautifully on a well-maintained forest path offers limited protection here, particularly for hikers carrying a loaded pack. Mid-cut or high-cut hiking boots with a stiff midsole provide meaningful ankle stability on these steep, uneven descents and are the preferred choice for most inner-canyon hikes.
In winter and early spring, the upper trail sections can be coated in ice or compacted snow for long stretches. This is where microspikes, lightweight traction devices that strap over your boots, become essential. Attempting the Bright Angel or South Kaibab trail on icy switchbacks without traction devices is genuinely hazardous. The grade is steep enough that a slip can result in a long, uncontrolled slide. Microspikes weigh very little, pack flat, and can mean the difference between a successful winter hike and an emergency rescue.
Below the rim, the trail transitions to rocky, uneven desert surfaces where heat management becomes the primary footwear concern. Mesh uppers that allow airflow are preferable in summer, but they must be paired with high-quality wool or synthetic hiking socks that wick moisture and resist blistering. Never hike in the Grand Canyon in sandals or flip-flops, regardless of how warm it is. Rocky trail surfaces, loose gravel, and the physical demands of a multi-thousand-foot descent and climb demand full foot coverage and support.
Breaking in new footwear before a Grand Canyon hike is not optional. The combination of steep descent, heat, and extended mileage accelerates blister formation on any boot that isn’t already conformed to your foot. Bringing a blister kit including moleskin, athletic tape, and small scissors is a practical addition to any Grand Canyon packing list. A blister that would be a minor annoyance on a flat trail becomes a genuinely painful problem on a 4,000-foot climb out of the canyon.
Sun Protection as a System, Not an Afterthought
Standard sun protection advice covers sunscreen and a hat. In the Grand Canyon, sun protection needs to function as an integrated system because the exposure conditions are significantly more intense than most hikers anticipate. At 7,000 feet elevation, UV radiation is meaningfully stronger than at sea level due to reduced atmospheric filtering. As you descend into the canyon, the elevation drops but the exposure profile changes. Canyon walls reflect and concentrate sunlight from multiple angles simultaneously, exposing skin surfaces that a sun hat alone cannot protect.
The solar geometry of the canyon creates a phenomenon sometimes called the “reflective oven” effect in the inner gorge. Light-colored sandstone and limestone walls bounce direct sunlight back toward hikers from the sides and below, meaning that standard overhead sun protection leaves significant exposed skin vulnerable. Hikers who wear wide-brim hats but short sleeves often return from inner canyon hikes with severe sunburns on their arms, the backs of their hands, and under their chin, areas that receive intense reflected light that overhead shade cannot block.
A complete canyon sun-protection system includes:
- Sun-protective clothing with UPF 30+ rating or higher, long-sleeve shirts designed for hot-weather hiking are the most effective solution and are more reliable than sunscreen application, which degrades with sweat
- A wide-brim hat with a full circumference brim, baseball caps leave the ears and neck exposed; a hat with a 3-inch or wider brim provides substantially better coverage
- Sunscreen SPF 50+ applied liberally before departure, and carried in your pack for reapplication, since sweat and water degrade coverage within 60 to 90 minutes of activity
- UV-blocking sunglasses with wraparound coverage, canyon conditions create glare from multiple angles; standard fashion sunglasses with open frames allow lateral UV exposure
- Neck gaiter or buff, provides coverage for the back of the neck and can be wet for evaporative cooling in heat
Lip protection with SPF coverage is also frequently overlooked. Dry air and intense sun create ideal conditions for sunburned, cracked lips that become genuinely painful over multi-day hikes. Carrying an SPF lip balm and applying it regularly adds negligible weight and prevents a real source of discomfort.
Grand Canyon Trail Conditions and How They Shape Your Gear Choices
Understanding Grand Canyon trail conditions before you pack is as important as understanding the weather. Trail conditions at the Grand Canyon are not simply a function of weather. They reflect the specific characteristics of each trail, the time of year, recent precipitation, and the maintenance schedule of the National Park Service. Conditions that are well-established on one trail may not apply at all to another, even on the same day.
Bright Angel Trail Conditions
Bright Angel is the most heavily maintained trail in the park and the most forgiving for less-experienced hikers. The paved upper switchbacks and maintained tread make it a reasonable choice for a wide range of fitness levels. However, “maintained” does not mean “easy.” The grade is relentless, and the combination of descent and subsequent ascent demands more from your legs and cardiovascular system than the distance alone suggests. Bright Angel also has the most reliable water access of the main South Rim trails, which affects your water-carry calculation.
South Kaibab Trail Conditions
South Kaibab is steeper, more exposed, and has no water sources below the rim. It offers extraordinary views from its ridgeline route but provides no shade and no opportunity to refill water between the trailhead and Phantom Ranch, roughly 7 miles and 4,800 feet below. Packing for South Kaibab requires carrying all the water you will need for the descent and the return, which substantially increases pack weight. In summer, this trail is genuinely dangerous for day hikers attempting to reach the Colorado River. The NPS recommends turning around at Cedar Ridge (1.5 miles) or Skeleton Point (3 miles) for day hikers in warm weather.
Hermit Trail and Off-Corridor Trails
Hermit Trail and other off-corridor routes are unmaintained. Trail surfaces are rockier, routes are less clearly marked, and the physical demands are higher. For these trails, navigation tools including a downloaded offline map, a compass, and the confidence to use them are essential additions to your pack. Water sources may be seasonal and unreliable, and the increased difficulty means your physical reserves are depleted faster, raising the importance of calorie-dense food and a fully stocked first-aid kit.
Checking current Grand Canyon trail conditions through the NPS Grand Canyon trail conditions page before your visit is the most reliable way to understand what you will actually encounter. Trail reports are updated regularly and provide specific information about closures, hazards, and water availability that no generalized guide can replicate.
The Grand Canyon Packing Framework: A Zone-Based Decision Model
Rather than building a flat, undifferentiated list of items, experienced canyon hikers think in zones. Every item on your packing list should be evaluated against three questions: Does it serve the rim zone? Does it serve the transition zone? Does it serve the inner canyon zone? Items that serve all three zones earn their weight. Items that serve only one zone need to be lightweight and packable enough not to burden the other two.
| Gear Category | Rim Zone Need | Transition Zone Need | Inner Canyon Need | Priority Rating |
|---|---|---|---|---|
| Hydration System (3L+) | Moderate | High | Critical | ⭐⭐⭐⭐⭐ |
| Electrolyte Supplements | Low | High | Critical | ⭐⭐⭐⭐⭐ |
| UPF Sun Shirt (long sleeve) | Low–Moderate | High | Critical | ⭐⭐⭐⭐⭐ |
| Insulating Layer (packable) | Critical (cold months) | Low | Low–None | ⭐⭐⭐⭐ (Oct–Apr) |
| Microspikes / Traction Devices | Critical (Dec–Mar) | High (Dec–Mar) | Low | ⭐⭐⭐⭐⭐ (winter only) |
| Headlamp | High (summer pre-dawn) | Moderate | Low (daytime) | ⭐⭐⭐⭐⭐ |
| Blister Kit | Low | High | High | ⭐⭐⭐⭐ |
| Wide-Brim Sun Hat | Moderate | High | Critical | ⭐⭐⭐⭐⭐ |
| Trekking Poles | High (descent) | Moderate | High (ascent) | ⭐⭐⭐⭐ |
| Emergency Whistle / Space Blanket | Low | Moderate | High | ⭐⭐⭐⭐ |
Trekking poles deserve special attention in this framework. They serve two distinct functions at the Grand Canyon that make them worth their weight regardless of your fitness level. On the descent, poles reduce the load on your knees during the steep, sustained downhill that characterizes the first hour or more of most inner-canyon hikes. Knee fatigue from unbraced descent is a primary cause of slower-than-expected return trips. On the ascent, poles provide the upper-body engagement that converts a purely leg-driven effort into a full-body movement, meaningfully extending the time before leg failure becomes a limiting factor. For any hiker planning to go beyond the first mile, poles are a genuine performance and safety tool, not just a comfort accessory.
Grand Canyon Travel Tips for Families with Children
Packing for children at the Grand Canyon introduces a separate set of considerations that standard hiking checklists do not adequately address. Children are more vulnerable to heat illness than adults, lose fluids faster relative to body weight, and are less reliable about communicating thirst or discomfort until they are already significantly affected. They also present gear challenges that require creative solutions.
Children’s footwear is frequently the weakest link in a family packing plan. Many families bring children in sneakers or casual shoes that provide inadequate ankle support and traction for the steep, rocky terrain of the upper trails. Youth hiking boots with ankle support are worth the investment for any child who will be hiking below the rim. For very young children in carriers, the carrier itself must be properly fitted to the adult wearing it and must include adequate shade coverage for the child, since infants and toddlers cannot regulate their own sun exposure or communicate overheating effectively.
Age-appropriate trail selection is as important as gear selection. The Rim Trail along the South Rim is paved, mostly flat, and provides exceptional canyon views without any below-rim hiking. For families with younger children, this is often the better choice over attempting a descent. The first mile of Bright Angel Trail to the first tunnel is a manageable introduction to below-rim hiking for older children with appropriate footwear and hydration. Going deeper than 1.5 miles with children under 10 in warm weather requires very careful planning and should be reserved for early-morning starts with a clear turnaround plan.
Before entering the park, families visiting the Grand Canyon often find it valuable to stop at Grand Canyon Visitor Center IMAX, located in Tusayan just outside the South Rim entrance. The flagship film, “Grand Canyon: Rivers of Time,” screens on a six-story IMAX screen using IMAX with Laser technology and provides children with a visually immersive introduction to the canyon’s geology and scale that dramatically enhances what they see on the trail. Understanding the geological story of the canyon turns a hiking experience into a genuinely educational one, and children who arrive with context tend to engage more deeply with what they observe. The facility’s retail store also carries hiking gear and supplies, a practical stop for families who realize they’ve left something at home before committing to their first trail.
What the Monsoon Season Means for Your Pack
The North American monsoon arrives at the Grand Canyon roughly between mid-July and mid-September, and it fundamentally changes the packing calculus for summer visitors. This is not the steady, gray rain of Pacific Northwest weather. Monsoon storms at the Grand Canyon are fast-moving, intense, and capable of producing flash flooding in canyon slots and tributary drainages with little or no warning at trail level. A storm dropping rain several miles away can send a wall of water through a dry canyon creek bed with no visible warning clouds overhead.
For hikers, the monsoon demands a lightweight rain layer that packs small, even during what appears to be a clear morning. Afternoon storm buildup is the typical monsoon pattern, meaning that hikers who start early and plan to be back at the rim by early afternoon are generally safer than those lingering in the inner canyon during late-afternoon hours. A packable rain shell that weighs under a pound adds meaningful protection and can double as a wind layer during cooler mornings.
Flash flood awareness is a separate and critical component of monsoon preparedness. The NPS provides specific guidance on flash flood safety for Grand Canyon visitors, and hikers planning to spend time near creek drainages or in narrow canyon sections should review this information carefully. The key behavioral rule is simple: if you hear a roaring or rumbling sound from upstream, or if a normally clear creek begins to run muddy, move immediately to high ground and do not attempt to cross or remain in the drainage. This requires no special gear, only awareness and a willingness to act on it quickly.
Building Your Grand Canyon Hiking Guide Around Real Turnaround Discipline
Every Grand Canyon hiking guide covers what to pack. Far fewer address the behavioral discipline that determines whether that gear is sufficient. The single greatest factor in Grand Canyon rescues is not inadequate gear. It is inadequate turnaround discipline: hikers who reach a landmark and continue despite the fact that their water, energy, or time budget is already at the boundary of what a safe return requires.
The “halfway” rule is the most commonly cited turnaround heuristic, and it is consistently misapplied. Many hikers interpret it as “turn around when you’ve hiked half the planned distance.” The correct interpretation is: turn around when you have consumed half your water, half your food, and have adequate energy remaining for the return trip, regardless of how far you have traveled. Because the return trip at the Grand Canyon is almost always harder than the descent (it goes uphill, through zones that have heated up since your morning start), the return requires more resources than the descent consumed. A proper Grand Canyon turnaround formula weights the return at 1.5 to 2 times the resource cost of the descent, not an equal share.
This behavioral discipline is worth building into your packing strategy explicitly. Carry a small notepad or use your phone to record the time and your remaining water volume at each trail landmark. When you reach the point where your remaining resources are at the threshold for a safe return, you turn around. Not one more overlook. Not one more switchback. This discipline, combined with appropriate gear, is what separates enjoyable Grand Canyon hikes from emergency rescues.
The Pre-Hike Stop That Changes Everything
One of the most practical Grand Canyon travel tips for first-time visitors is to build in a deliberate stop before entering the park. Many visitors drive directly through Tusayan and into the park without pausing, which means they arrive at the trailhead having missed the opportunity to check gear, understand what they are about to experience, and make any last-minute adjustments to their plan.
Grand Canyon Visitor Center IMAX, located in Tusayan just minutes from the South Rim gates, serves exactly this function. Beyond the opportunity to watch “Grand Canyon: Rivers of Time” on a six-story IMAX screen and arrive at the rim with a genuine visual and geological understanding of what you are seeing, the facility offers practical pre-hike services. The large retail store carries hiking gear and supplies, making it possible to pick up forgotten items before committing to the trail. National Park entrance passes are available on-site, eliminating the wait at the entrance gate that can add significant time to your arrival during peak periods. If you’re planning a guided experience, the Pink Jeep Tours office is on-site, with tours departing directly from the front door, and every Pink Jeep Tour originating from Grand Canyon Visitor Center IMAX includes a ticket to the IMAX film.
For families in particular, watching the IMAX film first transforms the hiking experience. Children and adults who arrive at the rim with a visual reference for the canyon’s scale, its geological layers, and the story of the Colorado River engage with the landscape in a fundamentally different way. The canyon becomes a place they understand, not just a place they are looking at. Booking IMAX tickets online in advance also means you save 20% compared to walk-up pricing, a straightforward benefit for families managing vacation budgets. And if you’re driving an EV, the facility’s Ultra-Fast 150 kW and Hyper-Fast 350 kW charging stations make it a logical and efficient stop on any Southwest road trip itinerary.
The Tusayan Shuttle also connects Grand Canyon Visitor Center IMAX to the park during peak season, giving visitors a convenient option to skip the parking lines and enter the park stress-free via the Grand Canyon Tusayan Shuttle.
Frequently Asked Questions About Grand Canyon Packing and Trail Preparation
What is the most important thing to pack for a Grand Canyon day hike?
Water capacity is the single most critical element. Most hikers underestimate how much they will need, particularly in warm weather. A minimum of 3 liters of water for a half-day hike below the rim in moderate temperatures is a reasonable baseline, and that requirement increases significantly in summer. Electrolyte supplements are equally important and are frequently overlooked.
How much water do I actually need for a Grand Canyon hike?
The NPS recommends drinking approximately one liter of water per hour during strenuous activity in hot conditions. For a full inner-canyon day hike in summer, this can mean carrying 4 to 6 liters. The exact amount depends on your pace, the temperature, and the specific trail’s water availability. Trails without water sources below the rim (like South Kaibab) require carrying everything you will need.
What should I wear hiking at the Grand Canyon?
Moisture-wicking, non-cotton layers are the foundation. A long-sleeve UPF-rated sun shirt provides better sun protection than sunscreen alone in the reflective canyon environment. Sturdy, well-broken-in hiking boots with ankle support are strongly preferred over trail runners or sneakers. A wide-brim hat and UV-blocking sunglasses round out the essential clothing system.
Is the Grand Canyon safe to hike in summer?
Yes, with proper preparation and strict behavioral discipline. The NPS recommends hiking only before 10 a.m. and after 4 p.m. during the hottest months, turning around well before reaching the canyon floor on day hikes, and carrying substantially more water and electrolytes than you expect to need. Many Grand Canyon rescues occur in summer and involve hikers who were adequately equipped but pushed beyond what their resources could support.
Do I need microspikes for the Grand Canyon?
Yes, if you are hiking below the rim between December and March. The upper switchbacks of Bright Angel and South Kaibab trails regularly become icy and can remain that way for days after a winter storm. Microspikes are lightweight, inexpensive, and essential for safe winter hiking. Without them, the descent on icy trail sections is genuinely dangerous.
What are the best hiking trails at the Grand Canyon South Rim for beginners?
The Rim Trail is the most accessible option, offering spectacular canyon views with minimal physical demand. For a first below-rim experience, the first 1.5 miles of Bright Angel Trail to the first rest house is a manageable goal for most fitness levels. South Kaibab to Cedar Ridge (1.5 miles) offers outstanding panoramic views with a more demanding grade. Both trails require turning around well before reaching the canyon floor for day hikers without overnight permits.
Can I hike to the Colorado River and back in one day?
The NPS strongly discourages this for most visitors, particularly in warm weather. The round trip to the Colorado River and back on Bright Angel Trail is approximately 18 miles with nearly 5,000 feet of elevation change. Even for very fit hikers, the return ascent in afternoon heat is physically demanding and time-consuming. Phantom Ranch overnight permits allow visitors to break this trip into two days, which is the recommended approach for most people.
What food should I pack for a Grand Canyon hike?
Calorie-dense, easily digestible foods that don’t require preparation work best. Salty snacks including nuts, jerky, and crackers help replace sodium lost through sweating and support electrolyte balance. Energy bars, dried fruit, and nut butter packets are reliable options. Avoid foods that melt, spoil quickly in heat, or require significant digestive effort during strenuous activity. Eating small amounts consistently throughout the hike maintains energy levels more effectively than large meals at designated stops.
Do I need a permit to hike at the Grand Canyon?
Day hiking on the main corridor trails (Bright Angel and South Kaibab) does not require a permit. However, overnight camping below the rim at Bright Angel Campground or Cottonwood Campground requires a backcountry permit from the NPS, which must be obtained in advance through a competitive lottery process. The NPS Backcountry Information Center manages permit requests, and demand significantly exceeds availability during peak seasons.
What Grand Canyon weather app or resource should I use before my hike?
The National Weather Service maintains a dedicated forecast point for the Grand Canyon South Rim. More importantly, the NPS Grand Canyon website provides current trail conditions, water availability updates, and ranger-issued advisories that no standard weather app can replicate. Checking both resources the night before your hike and on the morning of your departure gives you the most complete and current picture of what you will encounter.
Is a guided tour better than self-guiding for a first Grand Canyon visit?
For many first-time visitors, a guided tour provides a meaningful safety and experiential advantage. Guides understand current trail conditions, know the signs of heat illness, carry emergency equipment, and provide geological and cultural context that transforms a hike into a learning experience. Pink Jeep Tours, operating from Grand Canyon Visitor Center IMAX in Tusayan, offers guided canyon experiences departing directly from the facility’s front door, with every tour including a ticket to the IMAX film. For visitors uncertain about their fitness level or unfamiliar with desert hiking, a guided experience is a smart first step.
What’s the best time of year to hike the Grand Canyon?
Fall (September through November) and spring (March through May) offer the most balanced conditions for most hikers: moderate temperatures at the rim, tolerable inner canyon heat, and generally stable weather. Early fall combines summer-like wildflower remnants with cooling temperatures. Spring brings wildflowers below the rim and snowmelt views at higher elevations. Winter hiking is peaceful and uncrowded but demands winter gear preparation, particularly traction devices for icy trails.
Key Takeaways for Smart Grand Canyon Packing
- The “upside-down mountain” elevation inversion is the most important concept shaping your packing decisions. Heat increases as you descend, not as you ascend, which means you need gear for cold at the rim and extreme heat at the canyon floor.
- Water and electrolytes are a system, not separate items. Drinking large volumes of plain water without electrolyte replacement creates hyponatremia risk. Carry both and use both throughout your hike.
- Grand Canyon weather by season requires zone-specific thinking. Rim temperatures and inner canyon temperatures can differ by 25°F or more on the same day. Plan your clothing layers for both environments simultaneously.
- Footwear is your most consequential gear decision. Ankle-supporting hiking boots, moisture-wicking wool socks, and microspikes for winter conditions are the foundation of safe canyon hiking. Never hike below the rim in sandals or casual footwear.
- Sun protection must function as a system. UPF-rated long-sleeve shirts, wide-brim hats, SPF 50+ sunscreen, and UV-blocking wraparound sunglasses protect against the reflective multi-angle sun exposure unique to canyon environments.
- Turnaround discipline matters more than distance goals. Turn around when you have consumed half your water and food resources, regardless of your location on the trail. The return trip costs more than the descent in energy and time.
- Check current Grand Canyon trail conditions before every hike. The NPS Grand Canyon website provides real-time information that no generalized guide can replicate, including water source availability, trail closures, and ranger advisories.
- A pre-hike stop at Grand Canyon Visitor Center IMAX in Tusayan lets you orient yourself with the IMAX film, pick up any missing gear from the retail store, purchase your park entrance pass, and start your visit with the context that makes the canyon fully come alive.
The Grand Canyon rewards preparation. Not obsessive, gear-catalog preparation, but thoughtful, science-informed preparation that respects what the canyon actually asks of the human body. Understanding the elevation inversion, the zone-specific microclimate shifts, and the physiological demands of a below-rim hike turns a potentially daunting experience into one of the most extraordinary hikes in North America. Pack with the canyon’s physics in mind, not just the weather app’s forecast, and the experience on the trail will reflect exactly that level of thought.

About the author
Explore The Canyon Editorial Team
See The Canyon
Learn more →


Leave a Reply
Want to join the discussion?Feel free to contribute!