
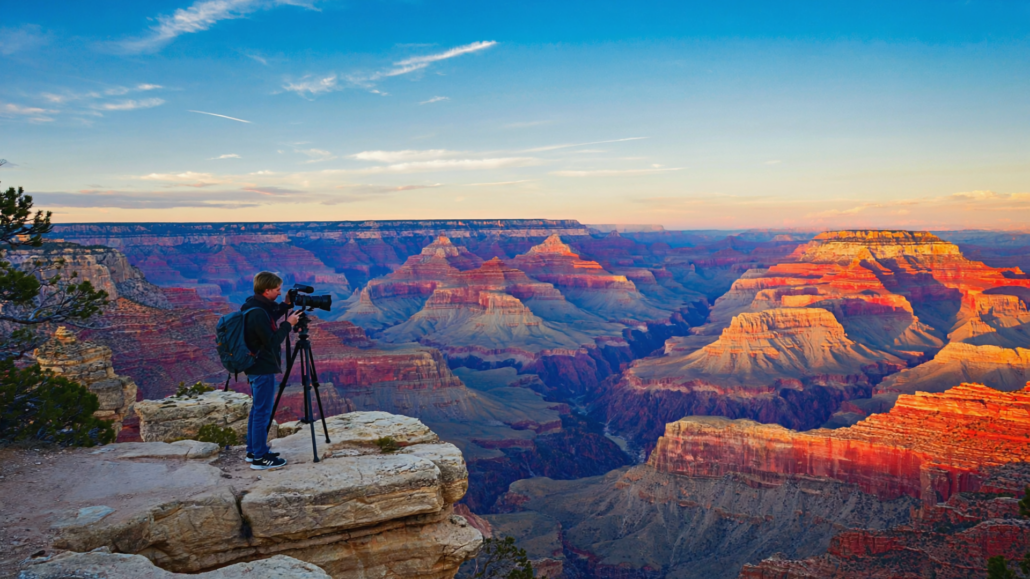
10 Underrated Grand Canyon Scenic Viewpoints Beyond Mather Point That Photographers Need to Visit
Mather Point is magnificent. That much is undeniable. But if your Grand Canyon photography begins and ends at the most-visited overlook on the South Rim, you are leaving some of the most dramatic compositions on earth completely undiscovered. The canyon stretches 277 river miles. Its rim is lined with dozens of distinct vantage points, each offering a completely different relationship between light, shadow, rock formation, and depth. For photographers willing to move past the crowds, the rewards are extraordinary and largely uncrowded, even during peak season.
This guide covers ten viewpoints that consistently deliver standout images yet receive a fraction of the foot traffic of Mather Point or Bright Angel Trailhead. These are not obscure backcountry scrambles requiring permits and overnight gear. Most are accessible by shuttle, short walk, or a brief drive along the East or West Rim roads. What makes them underrated is not inaccessibility but simply a lack of visibility in the mainstream Grand Canyon travel guide ecosystem. This article changes that.
Each section covers the photographic opportunity, the best light conditions, logistical access notes, and what makes the view compositionally distinct. Before you reach any of these overlooks, a stop at Grand Canyon Visitor Center IMAX in Tusayan, just minutes from the South Rim gates, is worth building into your first morning. The Grand Canyon IMAX Theater screens “Grand Canyon: Rivers of Time” on a six-story screen, giving photographers an aerial and geological orientation to the canyon’s structure that genuinely sharpens what you look for at each overlook.
Why Viewpoint Selection Matters More Than Equipment
Before diving into the list, it is worth establishing why location choice outweighs gear choice for Grand Canyon photography. The canyon’s scale creates a paradox: it is so large that a standard wide-angle shot from any rim often fails to communicate depth. What separates a compelling Grand Canyon photograph from a generic one is usually the presence of foreground structure, layered mid-ground formations, and a clear atmospheric depth that pulls the eye through the frame.
Viewpoints along the main Mather Point corridor are wide and open, which sounds ideal but actually removes foreground interest. The best Grand Canyon photography spots tend to have angular rim rock in the foreground, a visible curve of the canyon wall in the mid-ground, and an identifiable formation like a butte or mesa anchoring the background. The ten viewpoints below were selected precisely because they provide that three-layer composition naturally, without requiring creative gymnastics from the photographer.
Light angle also varies significantly by position along the rim. East-facing overlooks receive direct light in the first hour after sunrise, while west-facing points catch the warm, raking light of late afternoon. Several mid-rim points offer a north-facing geometry that catches reflected light from the canyon walls at midday, a time most photographers assume is useless but can produce vivid color saturation on certain rock faces.
1. Yaki Point: The Sunrise Benchmark That Most Visitors Sleep Through
Yaki Point consistently produces the most photographically complete sunrise on the South Rim, yet its vehicle-restricted access (private cars are prohibited; the free South Rim shuttle stops here) means the crowds that fill Mather Point at dawn rarely make it this far. The extra shuttle step filters out a significant portion of casual visitors, leaving serious photographers with elbow room at a viewpoint that arguably outperforms any other at first light.
The geometry at Yaki Point is exceptional. The overlook sits at a slight projection into the canyon, which means the rim curves away on both sides of the frame, giving a natural sense of envelopment. To the northeast, O’Neill Butte rises as a distinct sandstone tower, perfectly positioned as a mid-ground subject. In the deep background, the Kaibab Plateau’s forested rim creates a cool blue-green horizon line that contrasts with the warm orange of the Redwall Limestone illuminated by early sun.
Practical Access and Timing
The Kaibab/Rim Route shuttle (Orange Route) runs from the South Kaibab Trailhead area and stops at Yaki Point. During summer months, the shuttle begins before sunrise, which makes it viable for golden-hour arrivals. In fall and winter, check the current NPS shuttle schedule for the South Rim because start times shift with the season. Plan to arrive at the trailhead bus stop at least 20 minutes before your target shooting time to account for boarding and the drive.
Bring a wide-angle lens for the curving rim composition and a 70-200mm equivalent for isolating O’Neill Butte against the canyon backdrop. The platform area has natural rock seating that works well for low-angle foreground shots incorporating the rim ledge itself. Wind can be significant here, particularly in spring, so stabilize your tripod carefully.
What Makes This View Unique
Unlike Mather Point, which faces roughly north-northwest, Yaki Point faces more directly north. This orientation means the angle of early morning light strikes the inner canyon walls at a more direct angle, producing stronger shadows in the side canyons and more defined geological layering. The Tonto Platform, a broad green-gray shelf visible from this vantage, reads clearly in photographs taken here in a way it rarely does from further west along the rim.
2. Lipan Point: Where the Colorado River Finally Appears
For photographers who want the Colorado River in their frame, Lipan Point on the East Rim is the premier South Rim location. Situated along Desert View Drive roughly 25 miles east of Grand Canyon Village, this overlook delivers one of the longest visible stretches of the river from any South Rim vantage. The river bends through the canyon below in a long, glinting arc that anchors the lower portion of almost any composition taken here.
The East Rim drive is one of the most rewarding routes for Grand Canyon scenic viewpoints overall, and Lipan Point is its photographic highlight. The canyon here is geologically older in appearance, exposing the dark Vishnu Schist at river level, which creates a striking contrast between the black basement rock, the green river, and the warm tones of the upper canyon walls.
Light and Composition Strategy
Lipan Point faces roughly west-northwest, making it one of the better South Rim sunset locations. Late afternoon light floods the canyon from behind the photographer (who is facing north and west), illuminating the inner canyon walls and the river surface simultaneously. This is the rare Grand Canyon viewpoint where a direct-light sunset shot works, rather than the more common silhouette-against-the-sky compositions.
For sunrise, Lipan Point receives backlit conditions that produce extraordinary atmospheric layers when there is any haze in the canyon. The depth is extraordinary here: the canyon measures nearly a mile deep at this location, and the visible river adds a foreground-to-background narrative arc that most Grand Canyon photographs lack entirely.
Getting There
Private vehicles can drive Desert View Drive. The turnoff for Lipan Point is clearly marked. Parking is available and generally sufficient outside of peak summer weekends. The walk from the parking area to the overlook rim is minimal. Pack water regardless of season; the East Rim can be significantly warmer than the Village area in summer, and there are no services at this overlook.
3. Desert View Watchtower Terrace: Elevation and Ancient Architecture Combined
The terrace and upper levels of the Desert View Watchtower offer a completely different photographic angle: shooting outward from elevation, with the historic stone tower itself available as a foreground element. Built by architect Mary Colter in the 1930s, the Watchtower sits at the eastern end of the South Rim and reaches 70 feet above the rim, providing views that extend into the Painted Desert and the Navajo Nation lands to the east.
Most visitors photograph the canyon from the base-level terrace. Fewer climb to the upper viewing gallery inside the tower, where the windows frame specific sections of the canyon in a way that is almost cinematic. For photographers working with a telephoto lens, these framed views isolate particular formations with a precision impossible from open overlooks.
The Painted Desert Dimension
What no other South Rim overlook provides is the simultaneous view of the Grand Canyon to the west and the pastel badlands of the Painted Desert to the east. During golden hour, both landscapes are illuminated simultaneously, allowing a photographer to pivot 180 degrees and capture two completely different subjects in the same session. This dual-direction shooting opportunity is genuinely unique on the South Rim.
The tower structure itself is worth incorporating into compositions. Its rough stone construction and circular profile create strong foreground geometry. Early morning shots with the tower lit by rising sun against a deep blue sky, with the canyon falling away behind it, produce images that convey both the human history and geological scale of the region simultaneously.
Visiting Considerations
The Watchtower interior has posted hours and may have limited access during maintenance periods. Check current conditions via the NPS Desert View information page before planning a sunrise session. The area has a small store and seasonal snack services, making it a reasonable half-day destination combined with stops at Lipan Point and Navajo Point.
4. Pima Point: The West Rim’s Acoustic and Visual Marvel
Pima Point is the westernmost easily accessible overlook on the South Rim’s Hermit Road, and it offers something no other viewpoint on this list provides: on calm days, you can hear the Colorado River from the rim. The canyon walls at this location create an acoustic channel that carries the sound of distant rapids upward to the overlook. For photographers, this sensory dimension reinforces what the images need to communicate: genuine immensity.
Photographically, Pima Point delivers a westward-facing view down the canyon that captures the river in multiple bends visible simultaneously. The late-afternoon and sunset light here is exceptional because the photographer faces roughly east into the canyon while the setting sun illuminates the southern wall formations from behind. This creates rim-lit rock faces glowing orange against deep canyon shadows, one of the most distinctive lighting conditions anywhere on the South Rim.
Hermit Road Access
Private vehicles are restricted on Hermit Road from roughly March through November. The free Hermit’s Rest shuttle (Red Route) runs the length of the road with stops at multiple overlooks including Pima Point. This restriction actually benefits photographers: the road is quieter, the viewpoints less crowded, and the absence of vehicle noise enhances the experience of hearing the river below.
Pima Point is one of the furthest shuttle stops from the Village, which naturally reduces foot traffic relative to the first few overlooks along Hermit Road. Arrive by the second-to-last shuttle of the afternoon to give yourself a full golden-hour session before catching the last shuttle back. Always confirm final shuttle times before committing to this plan, as schedules vary seasonally.
What to Photograph Here
The view from Pima Point includes Granite Rapids far below, visible as white water against the dark river channel. With a telephoto lens, this whitewater detail can anchor the lower third of a wide canyon composition beautifully. The canyon wall geometry here also creates a strong diagonal line from upper-left to lower-right in a standard landscape orientation, which is compositionally satisfying in a way that the more panoramic east-facing views do not provide.
5. Moran Point: Named for a Painter, Built for a Photographer
Moran Point on Desert View Drive bears the name of Thomas Moran, the landscape painter whose images of the canyon helped convince Congress to preserve the area. It is fitting, then, that this overlook provides perhaps the most painterly composition on the South Rim: a broad, layered view with a prominent butte (Escalante Butte) positioned as a natural focal point in the mid-ground, framed by receding canyon walls on both sides.
The geological cross-section visible from Moran Point is unusually complete. The full stratigraphic sequence from rim to river is readable here, including the Kaibab Limestone at the top, the Toroweap and Coconino formations in the upper walls, the vivid red of the Hermit Shale and Supai Group in the middle, and the Tonto Platform before the inner gorge drops away. For photographers interested in conveying the canyon’s geological narrative, Moran Point offers the clearest visual “reading” of the rock layers.
Midday Photography at Moran Point
Counterintuitively, Moran Point performs well at midday during certain seasons. The point faces north, and between roughly 10 a.m. and 2 p.m. in summer, the sun illuminates the canyon walls in a way that saturates the red and orange tones of the Supai and Hermit formations without the harsh shadows that midday creates at other viewpoints. This makes it a viable shooting location during the hours most photographers spend waiting in their cars or at lunch.
Moran Point is accessible by private vehicle along Desert View Drive and has a modest parking area. It sees fewer visitors than Lipan or Desert View because it lacks the river view and the architectural landmark. For photographers, this translates to a quieter platform and the freedom to set up a tripod without navigating around tour groups.
6. Trailview Overlooks: Photographing Human Scale Against Canyon Scale
The Trailview Overlooks (I and II) along Hermit Road provide something photographically rare on the South Rim: a clear view of the Bright Angel Trail switchbacking down the canyon wall, with hikers visible as tiny figures against the geological scale. This human element transforms the composition from an abstract landscape into a photograph that communicates scale in an immediate, visceral way.
Grand Canyon photography often struggles with scale. Without a reference object, even the most dramatic canyon shots can read as curiously flat or unconvincing in print. The Bright Angel Trail switchbacks at Trailview provide that reference automatically. A telephoto lens isolates a group of hikers on the trail against the canyon backdrop, and suddenly the depth and height of the walls become legible in a way that purely geological compositions cannot achieve.
Timing for Trail Activity
The trail is most active in early morning (hikers descending) and mid-to-late afternoon (hikers returning). For the best combination of trail activity and light quality, aim for the two hours after sunrise. The light at this time hits the canyon wall behind the trail from the east, creating a backlit glow on the canyon rock while the trail itself sits in softer, diffused light that renders the hikers and trail surface clearly without blown highlights.
The overlooks are among the first stops on Hermit Road, making them accessible even during peak shuttle hours. The short walk from the shuttle stop to Trailview I is minimal, and the view opens immediately without the longer rim walk required at some other overlooks.
7. Powell Point: Memorial, Monument, and Magnificent Canyon Framing
Powell Point, also along Hermit Road, marks the location of a memorial to Major John Wesley Powell, the first documented leader of a Colorado River expedition through the Grand Canyon. The memorial structure itself, a simple stone monument on a projecting rim point, creates a powerful compositional anchor for photographers who want to incorporate the canyon’s human history into their imagery.
The overlook at Powell Point projects slightly further into the canyon than the surrounding rim, which creates the perception of greater depth in photographs taken here. The foreground rim rock is dramatic and angular, and the memorial stone provides a vertical element that prevents wide-angle compositions from feeling flat. The view looks out across a broad section of the inner canyon with layered buttes visible in the distance.
Compositional Technique
Photograph the memorial in silhouette against a sunrise or sunset sky, with the canyon falling away in the background, and the resulting image works on multiple levels: geological grandeur, historical context, and human aspiration simultaneously. A 24mm to 35mm lens works well for this foreground-to-infinity composition. Position yourself low and close to the memorial to maximize its apparent size against the canyon background.
Powell Point is a shuttle stop on the Red Route and sees moderate foot traffic. The historical significance of the location attracts visitors who are less focused on photography, which means the overlook is rarely crowded from a pure photography standpoint. Arrive early or stay through the mid-morning lull after the initial sunrise crowd disperses.
8. Grandview Point: The Canyon’s Most Vertically Dramatic Overlook
Grandview Point sits at one of the highest elevations along the South Rim and delivers arguably the most vertically dramatic view available from any paved-road-accessible overlook. The canyon walls drop away at an exceptionally steep angle from the rim here, and Horseshoe Mesa, a broad flat-topped formation visible directly below, creates one of the most compositionally complex mid-ground subjects on the entire South Rim.
Grandview was the site of one of the first tourist facilities at the Grand Canyon, and the old Grandview Trail below the rim is considered one of the more rugged maintained day hikes in the park. For photographers who want to capture both the canyon and the trail infrastructure, a telephoto shot down onto the first switchbacks of the Grandview Trail with Horseshoe Mesa in the background is a compelling composition unavailable from any other vantage.
Why the Vertical Drop Matters Photographically
Most South Rim overlooks present a predominantly horizontal composition: wide canyon, receding walls, distant North Rim. Grandview breaks this pattern by presenting a composition with genuine vertical drama. The sense of looking down, rather than merely across, is palpable in photographs taken at the very edge of the rim here. This is one location where shooting in portrait orientation rather than landscape can produce more powerful results because the vertical depth becomes the story.
Grandview Point is located along Desert View Drive and is accessible by private vehicle. It is one of the quieter overlooks on the drive, partly because it lacks the river view of Lipan and the landmark architecture of Desert View. For photographers, this means reliable access to the rim edge without competing for position.
Seasonal Considerations
Grandview sits at a slightly higher elevation than many other overlooks, which means it receives winter snow earlier and retains it longer. A fresh snow dusting on the rim rock with the warm-toned canyon below creates one of the most visually striking conditions possible at the Grand Canyon. Fall and winter visits to Grandview, particularly after overnight snow events, can produce images that look completely unlike anything captured during the crowded summer season.
9. Shoshone Point: The Permitted Overlook With No Crowds
Shoshone Point requires a free permit from the NPS for individual visitors (it is primarily reserved for events like weddings) but during non-event periods, permitted visitors walk a 1-mile round-trip trail through ponderosa pine forest to reach an overlook that most South Rim visitors never see. The isolation is genuine: on a typical weekday outside of peak season, a photographer may have this viewpoint entirely alone.
The view from Shoshone Point looks out across a broad, deep section of the canyon with excellent north-facing orientation. The rim at this location has natural rock formations that jut outward, providing foreground geometry without any constructed infrastructure. There are no railings, no paved pathways, no interpretive signs. The experience of standing at Shoshone Point is the closest a South Rim visitor can get to the feeling of discovering the canyon edge for the first time.
Permit Process and Access
The permit for Shoshone Point for non-event visits should be confirmed with the NPS before your trip. Check the NPS Grand Canyon permits page for current procedures, as the process can change between seasons. The trailhead is located along Desert View Drive, and the access road is gated; permitted visitors receive information about the gate combination or access procedure. The 0.5-mile walk in is flat and easy, through beautiful forest, making it one of the more pleasant approaches of any overlook on this list.
Photography Without Infrastructure
The absence of railings and paved surfaces at Shoshone Point changes the nature of the photography fundamentally. You can position yourself anywhere along the rim edge (exercise appropriate caution) and find foreground rock formations that have never appeared in a widely published photograph. This is genuinely rare for a South Rim location. Every composition feels fresh because the viewpoint has not been photographed to visual exhaustion the way Mather Point has.
10. Navajo Point: The Highest South Rim Overlook and a 360-Degree Horizon
Navajo Point is the highest elevation overlook on the South Rim accessible by road, sitting at approximately 7,498 feet above sea level, and it offers a 360-degree visual horizon that no other overlook on this list provides. To the north, the canyon stretches toward the North Rim. To the east, the Colorado River’s path through Marble Canyon is faintly visible in clear conditions. To the south and west, the forested Kaibab Plateau extends in all directions. And directly below, the inner canyon’s full depth is on display.
The 360-degree horizon means Navajo Point works in almost any light condition because there is always a direction where the light is interesting. At sunrise, face east toward the Painted Desert. At sunset, face west into the canyon. At midday, face north where the canyon walls catch reflected light. This flexibility makes Navajo Point one of the most reliable photography locations on the South Rim across any time of day or season.
The Wide-Angle and Panorama Opportunity
Navajo Point is ideal for panoramic photography because the elevated position minimizes foreground obstruction in any direction. A 180-degree panorama stitched from multiple frames here, encompassing the canyon, the Painted Desert, and the South Rim forest, is one of the most geographically comprehensive photographs achievable from any single South Rim location. With modern mirrorless cameras and in-camera panorama modes, this is technically straightforward.
The elevation also means Navajo Point is above the thermal inversions that sometimes fill the lower canyon with haze during summer mornings. Images taken here often have cleaner atmospheric clarity than those taken from lower-elevation overlooks, which matters significantly for distant background sharpness in telephoto compositions.
Getting to Navajo Point
Navajo Point is located on Desert View Drive, just west of the Watchtower area. Private vehicles can access it, and parking is available. It is one of the less-visited overlooks on Desert View Drive despite its superlative elevation, largely because it lacks a prominent architectural or geological feature to anchor marketing imagery. For photographers, the absence of an iconic “thing to photograph” is actually a freedom: the entire 360-degree panorama becomes the subject.
Building Your Grand Canyon Photography Itinerary
Ten viewpoints across two distinct rim roads requires deliberate planning. The following framework organizes these locations into a practical two-day photography itinerary for visitors staying in or near Tusayan, with notes on how to combine them efficiently.
| Viewpoint | Road Access | Best Light | Crowd Level | Key Subject |
|---|---|---|---|---|
| Yaki Point | Shuttle only | Sunrise ✅ | Low | O’Neill Butte, Tonto Platform |
| Lipan Point | Desert View Drive | Sunset ✅ | Low–Moderate | Colorado River arc |
| Desert View Watchtower | Desert View Drive | Sunrise + Sunset ✅ | Moderate | Tower architecture, Painted Desert |
| Pima Point | Hermit Road (shuttle) | Late afternoon ✅ | Very Low | River bends, Granite Rapids |
| Moran Point | Desert View Drive | Midday (summer) ✅ | Very Low | Escalante Butte, rock layers |
| Trailview Overlooks | Hermit Road (shuttle) | Early morning ✅ | Low–Moderate | Bright Angel Trail, hikers |
| Powell Point | Hermit Road (shuttle) | Sunrise + Sunset ✅ | Low | Memorial silhouette, inner canyon |
| Grandview Point | Desert View Drive | Sunrise ✅ / After snow ⚠️ | Very Low | Horseshoe Mesa, vertical depth |
| Shoshone Point | Permit required | Any ✅ | Essentially None | Raw rim edge, isolation |
| Navajo Point | Desert View Drive | Sunrise + Sunset ✅ | Very Low | 360° panorama, elevation clarity |
Day One: West Rim and Hermit Road Focus
Begin at the South Kaibab Trailhead for the shuttle to Yaki Point at sunrise. After the golden hour session, return to the Village area and pick up the Hermit Road shuttle. Work eastward through Trailview Overlooks, Powell Point, and Pima Point over the course of the morning and early afternoon. The Hermit Road overlooks cluster well and the shuttle makes them easy to combine. End the day with a return to the Village for dinner and rest.
Day Two: East Rim Drive Focus
Drive Desert View Drive from west to east, stopping at Moran Point and Grandview Point in the morning (the drive east means these north-facing overlooks are lit well in early-to-mid morning). Continue to Lipan Point for mid-morning or midday shooting, then proceed to Navajo Point and the Desert View Watchtower area. If Shoshone Point is permitted, it can be incorporated on either day given its Desert View Drive trailhead access.
The Best Time to Visit the Grand Canyon for Photography
The best time to visit the Grand Canyon for photography depends on what you are trying to capture, and no single season is objectively superior for all photographic goals.
Spring (March through May) delivers dramatic, variable light conditions. Storms move through the canyon creating shaft-of-light effects and cloud drama that summer’s clearer skies rarely provide. Wildflowers appear along the rim in April and May, adding foreground color to rim-edge compositions. Crowds begin building by late May, so the earlier in spring you visit, the more access to uncrowded overlooks.
Summer (June through August) is the highest-traffic period. The quality of light is good at sunrise and sunset but the canyon frequently develops afternoon thunderstorms that can produce extraordinary dramatic skies, particularly from east-facing overlooks. Summer also means the longest days, giving photographers the maximum window between sunrise and sunset. However, parking and shuttle access require earlier starts to avoid congestion.
Fall (September through November) is broadly considered the sweet spot for South Rim photography. Crowds thin noticeably after Labor Day. The angle of the sun drops lower in the sky, producing longer golden-hour windows and more raking light across canyon walls. The ponderosa pine forest along the rim turns a warm amber, adding foreground color that summer’s uniformly green canopy does not provide. Temperature ranges are more comfortable for extended shooting sessions.
Winter (December through February) offers the most dramatic potential reward for photographers willing to work in cold conditions. Snow on the rim transforms the landscape entirely, and the contrast between white snow, red canyon walls, and deep blue shadows produces images unlike anything achievable in other seasons. Fog inversions fill the canyon periodically in winter, creating a sea-of-clouds effect where only the highest buttes emerge from a white blanket. These conditions are unpredictable but extraordinary when they occur.
Regardless of season, the most reliable advice for Grand Canyon photography applies universally: be at your chosen overlook before the light you want to capture, not at the moment it arrives. Setup time, composition decisions, and camera adjustments take time, and the best light windows at Grand Canyon overlooks are often 20 to 40 minutes long. Arriving five minutes before sunrise means missing it entirely.
Preparing for Your South Rim Photography Trip: A Practical Pre-Entry Checklist
Even experienced photographers benefit from a structured pre-trip checklist for Grand Canyon visits. The logistics of South Rim access, combined with the physical demands of rim-to-trailhead movement during golden hours, create conditions where being underprepared costs you shooting time.
Before entering the park, a stop at Grand Canyon Visitor Center IMAX in Tusayan serves multiple practical functions for photographers. Located just outside the South Rim entrance gates, the facility sells various National Park entrance passes on-site, which saves significant time compared to purchasing at the entrance station during peak hours. The on-site retail store carries hiking gear and supplies that are useful for extended rim sessions. And the Grand Canyon IMAX Theater’s screening of “Grand Canyon: Rivers of Time” provides a geological and aerial orientation to the canyon’s structure that helps photographers understand which formations they are looking at from each overlook, sharpening their compositional decisions once they are on the rim.
Pink Jeep Tours, operating from the front door of Grand Canyon Visitor Center IMAX and recognized as Best Tour Operator, offers guided access to canyon viewpoints for photographers who want local knowledge about light conditions and access logistics. Every Pink Jeep Tour departing from Grand Canyon Visitor Center IMAX includes a ticket to “Grand Canyon: Rivers of Time,” making the combination a practical orientation package for first-day arrivals. For photographers visiting the South Rim for the first time, a guided Pink Jeep Tour on day one followed by independent exploration on day two is a highly efficient way to understand the rim’s geography before committing to solo predawn sessions.
If you are arriving by EV, Grand Canyon Visitor Center IMAX offers Ultra-Fast 150 kW and Hyper-Fast 350 kW EV charging on-site, one of the most capable charging setups available in the Tusayan area. Charging during your IMAX session or while picking up park passes means arriving at the rim with a full battery for the day’s driving.
For a sense of how the South Rim shuttle system operates and how it can save you time during peak season, the Tusayan shuttle guide at ExploreTheCanyon.com covers the practical logistics of getting from Tusayan into the park without the parking frustrations that affect many first-time visitors.
Gear Recommendations for South Rim Viewpoint Photography
No gear list replaces compositional skill, but certain equipment choices make a meaningful difference at Grand Canyon viewpoints specifically. The following recommendations are based on what the canyon’s scale and lighting conditions actually demand, not a generic landscape photography kit list.
Wide-angle lens (16-24mm equivalent): Essential for capturing the curving rim and conveying depth. Most Grand Canyon photographs that feel flat were shot with a focal length that was too long for the foreground-to-infinity composition. Going wider than you think you need is almost always the right call on first visits.
Telephoto lens (200-400mm equivalent): Critical for isolating buttes, the river, and geological detail. Many of the most striking Grand Canyon images are telephoto compressions of layered formations, not wide-angle panoramas. Pack both and be prepared to switch.
Sturdy tripod: Wind on the rim is persistent and unpredictable. A lightweight travel tripod that performs adequately on flat ground will struggle at exposed rim positions. Prioritize stability over weight savings for rim photography.
Neutral density filters: Useful for extending exposures during the bright midday window to smooth out cloud movement across the sky. A 6-stop ND filter gives enough flexibility for midday long exposures without requiring pitch-dark conditions.
Extra batteries: Cold temperatures in fall and winter drain batteries faster than specifications suggest. Carry at least two fully charged batteries for any early-morning session in cool weather.
Water and sun protection: Not photography gear strictly speaking, but a photographer who is dehydrated or overheated makes poor compositional decisions. The South Rim sits above 7,000 feet in many locations, and the sun’s intensity at elevation is significant. Treat hydration and sun protection as part of your camera kit.
Understanding Grand Canyon Light: A Photographer’s Orientation Framework
The Grand Canyon’s orientation creates a predictable light pattern that photographers can use to select viewpoints strategically. The canyon runs roughly east-west, with the South Rim forming the southern wall. This geometry produces a consistent set of light conditions that repeat daily and vary seasonally in a predictable way.
At sunrise, light enters from the east and illuminates the north-facing walls of the South Rim’s inner canyon. This means east-facing overlooks (Navajo Point, Desert View, Lipan Point, Moran Point) receive direct light on the canyon floor and the river, while the canyon walls closest to the photographer are in shadow. This produces dramatic contrast between lit canyon floor and shadowed near walls.
At sunset, the reverse applies. West-facing overlooks (Pima Point, Powell Point, the western Hermit Road stops) catch the last direct light on the canyon walls, turning them vivid orange and red while the canyon floor drops into blue shadow. The combination of warm upper walls and cool lower shadows is the classic Grand Canyon sunset effect.
During the two-hour window after sunrise on north-facing overlooks (Yaki Point, Grandview Point, Moran Point), reflected light from the illuminated North Rim bounces back across the canyon, filling shadows with a warm secondary light. This reflected fill is subtle but visible in photographs and prevents the harsh black shadows that direct backlight typically creates.
The blue hour before sunrise is often overlooked by photographers who target golden hour. At Grand Canyon viewpoints, the 20-30 minutes before sunrise produce a deep blue-purple cast across the canyon that contrasts with the warm amber of the pre-dawn sky. Long exposures during blue hour produce images with a color palette completely unlike any other time of day, and the absence of direct sun means there are no blown highlights to manage.
For wildlife photography alongside landscape work, the early morning and late afternoon windows are also when condors, mule deer, and Kaibab squirrels are most active along the rim. For practical wildlife viewing tips, the Grand Canyon wildlife watching guide at ExploreTheCanyon.com covers the behavioral patterns and best rim locations for wildlife encounters.
Frequently Asked Questions About Grand Canyon Photography Spots
Which Grand Canyon viewpoint is best for sunrise photography?
Yaki Point consistently delivers the strongest sunrise conditions on the South Rim. Its north-facing orientation, the presence of O’Neill Butte as a mid-ground subject, and the relatively low foot traffic due to shuttle-only access make it the most photographically productive sunrise location for serious shooters. Navajo Point is a strong alternative for photographers who want a 360-degree horizon and maximum elevation.
Can I drive to all of these viewpoints?
No. Hermit Road viewpoints including Pima Point, Powell Point, and Trailview Overlooks are restricted to private vehicles during most of the year (roughly March through November). Free NPS shuttles serve all Hermit Road stops. Yaki Point is shuttle-only year-round. Desert View Drive viewpoints including Lipan Point, Moran Point, Grandview Point, Navajo Point, and Desert View Watchtower are all accessible by private vehicle. Shoshone Point requires a permit and a short walk from a gated access road.
Is a tripod allowed at Grand Canyon viewpoints?
Tripods are permitted at outdoor viewpoints along the South Rim. They are not permitted inside the Grand Canyon IMAX Theater during screenings. Commercial photography (involving payment, models, or professional crews) may require a permit from the NPS; personal and travel photography does not. Confirm current commercial photography permit requirements with the NPS Grand Canyon filming and photography page.
What is the best time of year for Grand Canyon photography?
Fall (September through November) offers the most reliable combination of good light, comfortable temperatures, and reduced crowds. Winter produces the most dramatic and unusual conditions (snow, fog inversions) but requires cold-weather preparation and flexible scheduling around weather. Spring delivers dynamic storm light. Summer has the most daylight hours but the highest visitor density.
How do I get to Shoshone Point?
Shoshone Point requires an NPS permit for individual visitor access outside of reserved event periods. The trailhead is located along Desert View Drive. Permitted visitors walk approximately 0.5 miles on a flat trail through ponderosa pine forest to reach the overlook. Contact the NPS Grand Canyon concession office or check the NPS permits page for current procedures before planning a visit.
Is the Colorado River visible from South Rim viewpoints?
Yes, but only from specific locations. Lipan Point on Desert View Drive offers the best and most extensive river view from the South Rim. Pima Point on Hermit Road also provides a river view, including Granite Rapids visible with a telephoto lens. Most other South Rim overlooks do not have a direct line of sight to the river due to the inner gorge’s depth and orientation.
What focal length should I prioritize for Grand Canyon photography?
Both wide-angle and telephoto lenses have distinct applications at the Grand Canyon. A wide-angle (16-24mm equivalent) captures the curving rim and depth. A telephoto (200-400mm equivalent) isolates geological formations, the river, and wildlife. If carrying only one lens, a 24-70mm zoom covers a useful middle ground, though it sacrifices the extreme ends that produce the most distinctive images at either end of the focal length range.
Are there guided photography tours of the Grand Canyon?
Yes. Pink Jeep Tours, operating from Grand Canyon Visitor Center IMAX in Tusayan just outside the South Rim entrance, offers guided canyon tours led by knowledgeable local guides. Every Pink Jeep Tour departing from Grand Canyon Visitor Center IMAX includes a ticket to “Grand Canyon: Rivers of Time” on the six-story IMAX screen, providing useful geological and visual context before the tour. Guides are familiar with light conditions at specific viewpoints and can help photographers make informed decisions about timing and positioning.
How early should I arrive at a viewpoint for sunrise?
Arrive at the overlook at least 30 to 45 minutes before sunrise. This allows time for composition decisions, tripod setup, exposure testing in blue-hour conditions, and adjustments before the light changes rapidly. For shuttle-dependent viewpoints like Yaki Point, build in additional time for the shuttle boarding and transit. The first shuttle is often busy on clear mornings; having a backup plan for the second shuttle departure is prudent.
What is the Grand Canyon Visitor Center IMAX, and why is it useful for photographers?
Grand Canyon Visitor Center IMAX is a privately operated facility located in Tusayan, Arizona, just outside the South Rim entrance gates. It is distinct from the official NPS Visitor Center inside the park at Grand Canyon Village. For photographers, it serves as a practical pre-entry stop: the IMAX Theater screens “Grand Canyon: Rivers of Time” on a six-story screen, providing aerial and geological orientation to the canyon’s structure. The facility also sells National Park entrance passes, saving time at the gate, and houses a retail store with hiking supplies. Pink Jeep Tours departs from the front door. Book IMAX tickets online and save 20% compared to at-door pricing.
Is the East Rim Drive or West Rim (Hermit Road) better for photographers?
Both offer distinct advantages. Desert View Drive (East Rim) is better for river views, geological cross-sections, architectural subjects (the Watchtower), and panoramic elevation shots. It is also drivable by private vehicle year-round. Hermit Road (West Rim) is better for intimate canyon framing, human-scale subjects (the Bright Angel Trail), and west-facing sunset compositions. The shuttle-only restriction on Hermit Road actually benefits photographers by reducing foot traffic at overlooks.
Do I need a permit to photograph at the Grand Canyon?
Personal and travel photography at outdoor viewpoints does not require a permit. Commercial photography involving crews, models, or equipment that requires exclusive use of a location may require an NPS permit. Shoshone Point requires a visitor permit for non-event access regardless of photography intent. Always check the current NPS policy before planning any session that might fall into commercial or event categories.
Key Takeaways for Grand Canyon Photographers
- Viewpoint selection outweighs gear. The ten locations in this guide were chosen because their natural geometry, light orientation, and subject matter produce stronger photographs than the crowded Mather Point corridor, not because they require better equipment.
- Shuttle restrictions are a photographer’s advantage. Hermit Road’s vehicle restrictions reduce foot traffic at some of the best west-facing sunset viewpoints on the South Rim. Use the free shuttle system rather than viewing it as a limitation.
- Desert View Drive deserves a full day. The East Rim drive is consistently underappreciated in Grand Canyon travel guide coverage. Moran Point, Grandview Point, Lipan Point, Navajo Point, and the Watchtower together represent a full day of photographic opportunity with far less competition than the Village area.
- Fall is the optimal season for most photographers. Reduced crowds, lower sun angles, longer golden-hour windows, and autumnal rim color combine to produce the most consistently excellent shooting conditions of any season.
- Arrive early, always. The best light windows at Grand Canyon viewpoints are short. Being at the overlook before the light arrives, not at the moment of arrival, is the single most impactful habit for improving Grand Canyon photography results.
- Shoshone Point rewards the effort. The permit process is simple and the walk is easy. The reward is a genuine South Rim overlook with essentially zero competition for rim position. For photographers who value isolation and fresh compositions, it is one of the most valuable viewpoints on the entire South Rim.
- Start your visit at Grand Canyon Visitor Center IMAX. A stop in Tusayan before entering the park, combining an IMAX orientation screening with park pass purchase and tour booking, sets up a more informed and efficient photography trip than arriving cold at the South Rim entrance. Experience the canyon before you enter the park, and your first overlook visit will be richer for it.

About the author
Explore The Canyon Editorial Team
See The Canyon

