
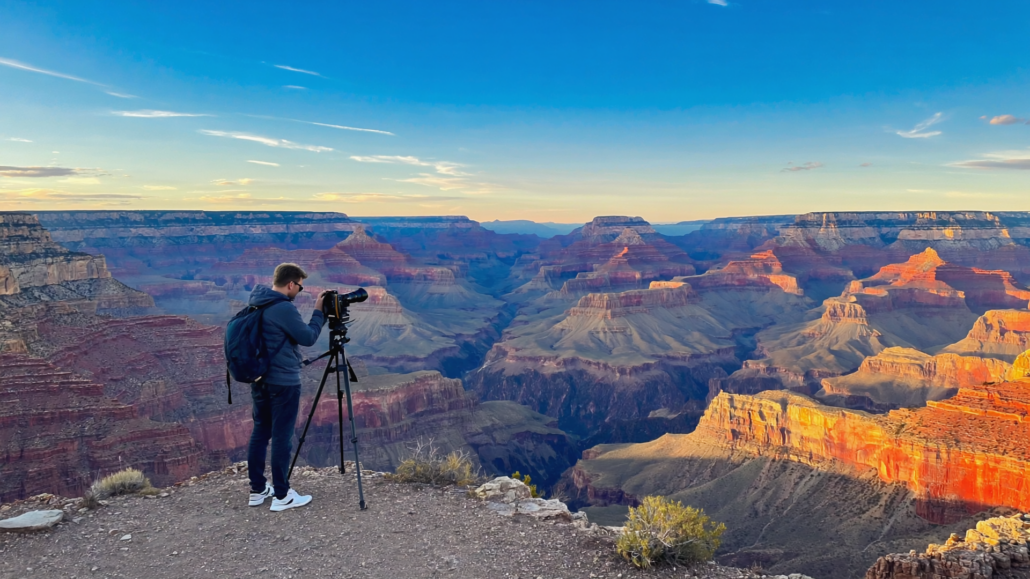
8 Grand Canyon Photography Techniques That Work Specifically at South Rim Viewpoints
Most visitors arrive at the South Rim with a smartphone or a camera, point it at the canyon, and walk away with a photo that looks exactly like everyone else’s. The Grand Canyon is 277 river miles long, a mile deep, and up to 18 miles wide, and yet the overwhelming majority of photographs taken here are shot from the same three spots, at the same midday hour, with the same flat light washing out every layer of color and depth. This guide exists to change that.
The South Rim’s viewpoints each have their own light behaviors, microweather patterns, and compositional challenges. What works at Mather Point will fail at Desert View. The angle that makes Yavapai Point sing at sunrise turns it into a blown-out mess by 10 a.m. These eight techniques are built around how the South Rim actually behaves, the specific geometry of its overlooks, the predictable movement of light across its amphitheaters, and the compositional tricks that turn a snapshot into something genuinely worth printing. Whether you’re here for a single afternoon or a multi-day trip, applying even two or three of these techniques will separate your shots from the millions of forgettable Grand Canyon photos that never make it out of a camera roll.
1. Chase the Golden Hour at Mather Point, and Know Exactly When to Leave
Mather Point is the most-visited overlook in the Grand Canyon, which means it is also the most photographed, and the most misused. The viewpoint opens onto a broad, deep amphitheater framed by the Bright Angel Canyon system to the north and the Colorado River corridor far below. At golden hour, the warm low-angle light rakes across the Redwall Limestone and the Tonto Platform in a way that no other time of day can replicate. But the window is brutally short, and knowing how to work it is what separates a great shot from a mediocre one.
The problem most photographers face at Mather Point is that they arrive exactly at sunrise or sunset, spend the first ten minutes jostling for position on the main viewing rail, and then photograph the canyon head-on. The result is a flat, symmetrical frame with a crowded foreground rail and a canyon that looks like a postcard. The solution is to arrive 30 to 40 minutes before golden hour begins and scout the secondary promontories that extend to the east and west of the main platform. These smaller fingers of rock give you an elevated angle over the main observation deck, remove the railing from your foreground entirely, and let you position the canyon’s layered buttes as mid-ground elements rather than distant backdrop.
During the first 15 minutes of golden hour, shoot toward the north-facing walls, they receive the warmest direct light first and the color temperature shifts rapidly. During the last 10 minutes before the sun drops below the South Rim’s horizon, pivot to capture the alpenglow that settles on the highest buttes like Brahma Temple and Zoroaster Temple. This brief alpenglow phase, often lasting only four to six minutes, produces the most saturated canyon reds and oranges of the entire day. After that window closes, Mather Point fills with lingering crowds and the light goes flat. That is your cue to leave.
How to Apply This at Mather Point
- Arrive 35 minutes before sunrise or 45 minutes before sunset to claim a secondary promontory position
- Shoot with the sun at a 30-45 degree angle to your subject, not directly behind you
- Use a polarizing filter during the first golden hour pass to deepen the blue of the inner gorge shadow
- Set your white balance manually to preserve the warm cast rather than letting auto white balance neutralize it
- Leave by the time the crowd peaks, the light has already peaked too
2. Use Yavapai Point’s East-Facing Geometry for Sunrise Depth
Yavapai Point offers something Mather Point cannot: a wide, unobstructed east-facing exposure that catches the first direct light of morning before it reaches anywhere else on the South Rim road. The viewpoint sits on a promontory that juts slightly north of the main rim, giving photographers a three-sided view that includes the Colorado River’s S-curve below, the layered temples to the northeast, and the receding canyon walls that create natural leading lines toward the horizon.
The challenge here is that sunrise at Yavapai is deceptively complex. The canyon floor sits in deep shadow long after the upper buttes are fully lit. This creates a massive dynamic range problem, your camera’s sensor simply cannot capture both the sunlit rim and the dark inner gorge in a single exposure without losing detail at one end or the other. Photographers who don’t plan for this come away with either blown-out buttes or a black canyon floor that looks like a void.
The solution is to bracket your exposures during the first 25 minutes of sunrise, capturing at least three frames per composition (one exposed for the lit buttes, one for the shadow detail, and one at the metered middle). These frames can be blended in post-processing using luminosity masks, a technique that allows you to pull the bright detail from one frame and the shadow detail from another without the halo artifacts that standard HDR processing produces. If you prefer to get it right in-camera, a graduated neutral density filter placed at the horizon line will compress the dynamic range enough to capture usable detail across the full frame in a single shot.
Yavapai is also one of the best Grand Canyon scenic viewpoints for capturing atmospheric depth. On mornings when residual moisture sits in the canyon, most common in late summer and early fall, a thin layer of haze settles in the inner gorge. This haze creates aerial perspective, making each successive layer of canyon wall appear progressively lighter and bluer. It is one of the rare conditions where a slight overcast sky actually helps rather than hurts, because it softens the top light while leaving the haze-filled gorge visually distinct.
Yavapai Point Timing Reference
| Time Window | Light Condition | Best Technique | Crowd Level |
|---|---|---|---|
| 30 min before sunrise | Blue hour, even shadow | Long exposure, canyon silhouette | ✅ Very low |
| First 15 min of sunrise | Raking low-angle light on east walls | Exposure bracketing, graduated ND | ⚠️ Moderate |
| 15–45 min after sunrise | Warm fill light, shadow detail visible | Single exposure, polarizer | ⚠️ Growing |
| 2 hours after sunrise | Flat overhead light, high contrast | ❌ Avoid landscape shooting | ❌ Peak crowds |
3. Work the Desert View Watchtower for Compositional Foreground
Desert View, located at the eastern end of the South Rim’s Desert View Drive, gives photographers something that the western viewpoints cannot: an architectural foreground element with genuine visual weight. The 70-foot Watchtower, designed by Mary Colter and completed in 1932, rises dramatically against the canyon panorama and provides a strong vertical element that anchors wide-angle compositions in a way that flat rim foregrounds simply cannot.
The compositional challenge at Desert View is avoiding the obvious shot, the Watchtower standing alone against a blue sky. That image exists in hundreds of thousands of travel photos. The more interesting approach is to use the tower as a framing device rather than a subject. Position yourself to the northeast of the tower so that its curved stone wall fills one-third of your frame, then let the canyon’s east-facing panorama, which on clear days extends to the Painted Desert and the Navajo lands beyond the park boundary, occupy the remaining two-thirds. This creates a strong foreground-to-background relationship that gives the viewer a genuine sense of scale and place.
Desert View also faces east-southeast, which means it catches the last direct light of the afternoon differently from the central rim viewpoints. In the hour before sunset, the Colorado River’s S-curve near the Unkar Delta catches direct light at a low angle, turning the water from its usual dark tone to a bright metallic silver or copper depending on the season. This river reflection is one of the more unusual light effects available at South Rim viewpoints and is nearly impossible to capture from central rim locations because the angle of view to the river is obscured.
For photographers visiting the South Rim for the first time, Desert View is worth the 25-mile drive east from Grand Canyon Village for this river light alone. The overlook also tends to be significantly less crowded than the central rim viewpoints, which means you can work a composition for as long as you need without competing for rail space. The Watchtower itself is open for interior access during regular operating hours, the painted interior provides compelling documentary photography opportunities that complement the landscape work outside.
How to Apply This at Desert View
- Use the Watchtower’s northeast corner as a foreground anchor in wide-angle compositions
- Arrive 90 minutes before sunset to catch the Unkar Delta river reflection
- Shoot with a focal length between 24mm and 35mm (full frame equivalent) to capture both foreground architecture and canyon depth
- On clear days, a telephoto lens (200mm+) lets you isolate the Painted Desert horizon beyond the canyon rim
4. Master the Blue Hour at Lipan Point for Long Exposure Work
Blue hour, the 20 to 30 minutes of diffuse, indirect light before sunrise and after sunset, transforms the Grand Canyon into something photographers rarely show the public. At Lipan Point, one of the most expansive Grand Canyon scenic viewpoints along Desert View Drive, the combination of a broad east-facing exposure and a clear sightline to the Colorado River creates ideal conditions for long-exposure blue hour photography. The canyon walls take on a cool blue-gray tone, the sky holds a deep indigo that no daytime shot can replicate, and the absence of direct light eliminates harsh shadows entirely.
Most photographers pack up at sunset. Staying for blue hour is one of the highest-return decisions you can make at the South Rim, because the light quality during this phase is among the most flattering the canyon ever receives. The challenge is that you need a tripod, full stop. Blue hour exposures range from 15 seconds to several minutes depending on your aperture and ISO settings, and handheld shooting at these durations produces nothing usable. A remote shutter release or your camera’s two-second self-timer prevents the camera shake that comes from physically pressing the shutter button at slow speeds.
At Lipan Point specifically, set up your tripod at the western end of the viewing area where the rim juts slightly north. From this position, the Colorado River is visible as a thin silver thread in the inner gorge, and the layered canyon walls create a series of receding horizontal planes that, in long exposure, render as bands of progressively lighter blue and gray. This layered effect is far more dramatic at blue hour than at golden hour, because golden hour’s warm light tends to flatten the distinction between adjacent rock layers that share similar warm tones. Blue hour’s cool, neutral light allows the eye to perceive subtle tonal differences between the Redwall, the Supai Group, and the Hermit Shale that the naked eye barely registers in person.
If you’re shooting with a mirrorless camera, enable your electronic first curtain shutter or fully electronic shutter to eliminate the vibration from mirror slap entirely. On very long exposures (60 seconds or more), even the vibration from an SLR mirror can introduce a subtle blur that shows up when you pixel-peep back home. Bring a headlamp with a red light mode to preserve your night vision while you work, and bring a warm layer, because temperatures at the South Rim rim can drop dramatically after sunset even in summer months.
5. Use Leading Lines From the Rim Trail Between Powell Point and Hopi Point
The paved Rim Trail section between Powell Point and Hopi Point is one of the most compositionally rich stretches of walkable South Rim access, and most photographers walk right past its best angles. The trail itself, the low stone wall that parallels it, and the alternating patterns of juniper and pinyon pine along the rim edge all function as natural leading lines that draw the viewer’s eye from the immediate foreground into the canyon’s depth. Used deliberately, these elements can transform a static canyon panorama into a photograph with genuine visual movement.
The technique is straightforward but requires low shooting positions that most visitors never attempt. Rather than standing at the viewing rail and pointing your camera at the canyon, get low, kneel, sit, or use a ground-level tripod head to position your lens 12 to 18 inches above the path surface. From this height, the trail’s edge curves away into the frame toward the canyon, creating a classic S-curve leading line that photographers in other landscapes spend considerable effort hunting down. The canyon then becomes the destination that the leading line is taking you toward, rather than just a backdrop behind a rail.
Hopi Point, at the western end of this stretch, is widely considered one of the best sunset Grand Canyon photography spots on the entire South Rim. Its elevated position and west-facing exposure give it a direct view of the sun descending over the canyon’s western plateaus, and the Colorado River is visible from multiple angles as it bends through the gorge below. The Rim Trail section just east of the main Hopi Point viewing platform offers a slightly recessed position from which you can frame the crowded main viewpoint as a mid-ground element, giving your photo a sense of human scale that pure landscape shots lack.
Powell Point, a short distance east, has a slightly different character. The overlook sits on a broad flat promontory with a memorial monument at its center. The monument itself can serve as a vertical anchor element for wide-angle compositions, functioning similarly to the Watchtower at Desert View. From Powell Point’s eastern edge, the Bright Angel Trail’s upper switchbacks are sometimes visible cutting into the canyon wall below, a detail that adds human context and scale to what might otherwise be an overwhelming and abstract panorama.
Leading Line Technique Quick Reference
- Position: Shoot from 12–18 inches above ground level along the Rim Trail
- Focal length: 16–24mm (full frame) to exaggerate the S-curve perspective
- Aperture: f/8 to f/11 for maximum depth of field from foreground to canyon horizon
- Timing: Golden hour for warm light; overcast days for even illumination of the trail surface
- Avoid: Midday when the canyon walls create strong shadows that compete with the trail leading line
6. Photograph Storm Light and Clearing Weather for the Canyon’s Most Dramatic Conditions
The most dramatic Grand Canyon photography conditions don’t come on clear days, they come in the 20-minute window after a storm clears, when shafts of light break through dissipating cloud cover and illuminate isolated buttes while the rest of the canyon remains in shadow. This phenomenon, sometimes called “storm light” or “clearing weather light,” is genuinely difficult to plan for, but understanding the canyon’s weather patterns gives you a meaningful edge.
The South Rim sits at approximately 7,000 feet in elevation. The canyon’s massive thermal mass creates its own localized weather, and afternoon thunderstorms are common during summer months, typically building from mid-morning and releasing in the early afternoon. After a summer storm passes, usually within 45 to 90 minutes of building, the cloud cover breaks from the west, and a brief window opens where shafts of direct sunlight punch through the remaining clouds and light individual buttes and plateaus in isolation. The contrast between the sunlit rock and the stormy gray background creates images with a depth and drama that no clear-sky shot can match.
Capturing this light requires being in position before the storm fully clears, which means tolerating some rain and wind. A good weather-resistant camera bag, a lens cloth for removing water droplets from your front element, and a rain cover for your camera body are non-negotiable if you’re serious about storm light photography at the South Rim. Set up at an elevated position, Yavapai Point, Mather Point, or Lipan Point all work well, and watch the western horizon for the cloud break. When the first shaft of light appears, you have seconds to minutes before it moves, so have your composition pre-set and your exposure dialed in before the light arrives.
Winter weather produces a different but equally compelling variation. Snow on the canyon’s upper rim and buttes creates a visual contrast that is impossible to achieve in any other season, the white cap on Zoroaster Temple against the red Redwall below, or a fresh snow line cutting horizontally across the canyon walls at the level of the Kaibab Limestone. For winter storm light, the clearing window after a snowstorm is your prime shooting opportunity. The snow-covered rim foreground, the clearing sky, and the partially illuminated canyon combine into a composition that very few visitors ever see because most people avoid the South Rim in winter. For photographers, that’s precisely the reason to go.
The National Weather Service provides hourly forecasts for the South Rim area that are reliable enough for trip planning purposes. Checking the forecast the evening before and planning your position based on expected storm clearing direction gives you a genuine advantage over photographers who simply hope for good weather.
7. Shoot the Canyon in Layers Using Telephoto Compression at Grandview Point
Grandview Point, located along Desert View Drive roughly 12 miles east of Grand Canyon Village, is one of the South Rim’s most underutilized photography locations precisely because it rewards telephoto technique rather than the wide-angle approach most canyon photographers default to. The overlook faces northeast and offers a direct sightline to Horseshoe Mesa, a broad flat promontory that juts into the canyon below, with multiple layers of canyon wall receding behind it toward the North Rim in the distance.
Telephoto compression is the optical effect produced by long focal lengths (200mm to 600mm) that makes objects at different distances appear closer together than they are. In a canyon context, this means that the canyon walls and buttes at varying depths, which might span 8 to 12 miles from the rim to the North Rim, appear stacked almost on top of each other, creating a visual density of layered color and texture that wide-angle shots physically cannot achieve. The effect is particularly powerful at Grandview because the view corridor faces directly toward the most layered section of the canyon’s interior, where eight or nine distinct geological formations are visible simultaneously.
To apply telephoto compression effectively at Grandview, use a focal length of at least 200mm (full frame equivalent) and shoot with a tripod, telephoto focal lengths amplify camera shake far more than wide-angle lenses, and even minor movement becomes visible at 400mm or longer. Focus approximately one-third of the way into the canyon scene rather than at the nearest visible butte, which gives the auto-focus system the best chance of resolving detail across the compressed depth of field. Shoot during the golden hour, when the low-angle light creates distinct shadows in the horizontal joints between rock layers, increasing the apparent texture and separation between formations.
Grandview Point also has good access to the rim edge at multiple points along the overlook’s walking path, which means you can vary your shooting position by 50 to 100 feet and substantially change the layering relationship between foreground buttes and background formations. Walk the entire overlook path before setting up your tripod, the best telephoto position often isn’t at the main viewing platform but at one of the secondary access points 150 to 200 feet along the path.
Telephoto vs. Wide-Angle at South Rim Viewpoints
| Viewpoint | Best Focal Length | Why It Works | Season Bonus |
|---|---|---|---|
| Grandview Point | 200–400mm | Layer compression across Horseshoe Mesa | Winter haze separation |
| Mather Point | 16–35mm | Broad amphitheater, foreground rock | Summer storm light |
| Yavapai Point | 24–70mm | River bend + temple depth | Fall haze, morning mist |
| Desert View | 24–200mm | Watchtower foreground + river light | Late afternoon river reflection |
| Lipan Point | 50–200mm | Blue hour layers, river thread | Post-sunset blue hour |
| Hopi Point | 16–50mm | West-facing sunset, river visible | Summer sunset |
8. Build a Two-Day Shooting Schedule Around the Canyon’s Predictable Light Cycles
The single most impactful photography technique available at the South Rim has nothing to do with camera settings, it’s planning your shooting schedule around the canyon’s daily and seasonal light cycles so that you’re at the right viewpoint at the right moment, every time. The Grand Canyon’s light is not random. It follows predictable patterns based on the sun’s position relative to the canyon’s orientation, and photographers who understand these patterns can plan a two-day shooting schedule that hits peak light at multiple viewpoints without wasted effort.
The South Rim runs roughly east-west, with the canyon opening to the north. This means that east-facing viewpoints (Yavapai, Lipan, Desert View, Grandview) receive their best direct light at sunrise and hold warm fill light through mid-morning. West-facing viewpoints (Hopi, Mohave, Powell) receive their best light in the hour before sunset. Central viewpoints like Mather catch usable golden hour light at both ends of the day, but their north-facing exposure means the canyon floor below them stays in shadow longer in the morning and falls into shadow earlier in the afternoon than the eastern viewpoints.
A practical two-day schedule for a serious South Rim photography visit might look like this:
Day 1: Arrive at Yavapai Point 35 minutes before sunrise for blue hour and first light. Work the eastern wall light for 45 minutes, then drive to Desert View (25 miles east) to catch mid-morning light on the Watchtower and the Unkar Delta. Spend midday resting, editing, or exploring the geological history of the canyon, midday light is rarely worth shooting. Return to Hopi Point 90 minutes before sunset for the canyon’s best west-facing light. Stay for blue hour.
Day 2: Start at Lipan Point for sunrise blue hour and storm light positioning (check the forecast the night before). After sunrise, drive to Grandview Point for telephoto compression work during mid-morning. Afternoon: rest and review. For sunset, choose Mather Point if you want the classic amphitheater view, or Powell Point if you want a less crowded vantage with the monument foreground element. Stay for alpenglow on Zoroaster and Brahma Temples.
This schedule is built around the canyon’s light geometry rather than around convenience, which is why it works. Most visitors do the opposite, they visit viewpoints in geographic order along the rim road, which means they hit eastern viewpoints in the afternoon and western viewpoints in the morning, exactly backwards from what the light requires. Reversing this pattern and building your itinerary around light rather than logistics is the single highest-leverage decision any South Rim photographer can make.
Seasonal Adjustments to the Light Cycle
The South Rim’s light behaves differently across seasons in ways that matter for photography planning. Summer brings longer golden hours and the possibility of monsoon storm light, but also the most crowded conditions at every viewpoint. Fall is widely regarded as one of the best seasons for canyon photography because of the combination of lower crowds, cooler temperatures, and the atmospheric haze that settles in the inner gorge during September and October, creating exceptional aerial perspective. Winter produces the shortest golden hours but the most dramatic conditions when snow is present, the contrast between snow-covered rim vegetation and the red canyon walls is unlike anything summer or fall offers. Spring brings variable weather and the possibility of wildflowers along the rim edge, which provide rare foreground color for wide-angle compositions.
For photographers visiting during fall and winter, checking the Grand Canyon National Park weather page before each shooting session is worth building into your daily routine. Rim temperatures can change rapidly, and understanding incoming weather systems is both a safety practice and a photography planning tool.
Before You Shoot: How the Grand Canyon Visitor Center IMAX Helps You See More
Understanding the canyon before you stand at the rim changes what you see when you get there. The geological layers, the named buttes and temples, the river’s course through the inner gorge, all of these become compositional tools once you can identify and locate them. Photographers who arrive at the South Rim already familiar with the canyon’s geography make better framing decisions faster, because they know which butte they’re looking at, which direction the light will hit it, and where the river appears in relation to each viewpoint.
Located in Tusayan just outside the South Rim entrance, Grand Canyon Visitor Center IMAX screens “Grand Canyon: Rivers of Time” on a six-story screen using IMAX with Laser technology. The film covers the canyon’s geological formation, its river corridor, and its cultural history in a way that 45 minutes of rim walking simply cannot match. For photographers specifically, seeing the canyon’s interior presented at that scale, including aerial and river-level perspectives that no rim viewpoint provides, builds a mental map of the canyon’s three-dimensional structure that directly informs shooting decisions at the overlooks. You leave the theater knowing what Horseshoe Mesa looks like from above, how the Colorado River’s course relates to the buttes that frame it, and what the inner gorge’s Vishnu Schist looks like up close. That context is genuinely useful at the rim.
Pink Jeep Tours, operating from the Grand Canyon Visitor Center IMAX front door and recognized as Best Tour Operator, includes a “Rivers of Time” IMAX ticket with every tour departing from the facility. This combination of cinematic orientation and guided field access is particularly useful for photographers who want someone with on-the-ground knowledge pointing them toward the best angles and timing at each stop. Every Pink Jeep Tour originating from the facility includes that IMAX experience, making it a practical package for first-time visitors who want both orientation and access.
The facility also sells various National Park entrance passes on-site, a meaningful time-saver during peak season when entrance station lines can add 20 to 30 minutes to your arrival. For photographers working a tight golden hour window, those saved minutes matter. The facility’s Tusayan location just outside the park gates makes it a natural first stop before entering the park, whether you’re stopping to buy your park pass, charge an EV at the on-site Ultra-Fast 150 kW or Hyper-Fast 350 kW chargers, or simply watch the film before heading to your first viewpoint. Book IMAX tickets online in advance to save 20% and secure your preferred showtime before peak-hour sellouts.
Frequently Asked Questions About Grand Canyon Photography
What are the best Grand Canyon photography spots on the South Rim for beginners?
Mather Point and Yavapai Point are the most accessible starting points for photographers new to the South Rim. Both are within walking distance of the main visitor facilities at Grand Canyon Village and offer broad, unobstructed canyon views. Mather Point’s secondary promontories east and west of the main platform give beginners room to experiment with composition without competing for rail space. Yavapai’s east-facing exposure makes it forgiving for sunrise shooting because the light builds gradually rather than arriving suddenly as it does at west-facing viewpoints.
What time should I arrive for sunrise photography at the South Rim?
Plan to be at your chosen viewpoint at least 30 to 35 minutes before the official sunrise time. This gives you the blue hour window before sunrise, time to set up your tripod and composition without rushing, and a buffer to handle the crowd that typically arrives exactly at sunrise. Arriving earlier also means you experience the canyon in near-darkness, which produces a completely different set of photographic opportunities including star trails and pre-dawn canyon silhouettes.
Do I need a tripod for Grand Canyon photography?
A tripod is not required for every shot at the South Rim, but it is essential for blue hour photography, long exposures, and telephoto work at 200mm or longer. Modern mirrorless cameras with in-body image stabilization can handle handheld shooting at golden hour with acceptable results, but blue hour and post-sunset photography at any viewpoint will produce sharper results on a tripod. Compact travel tripods are easy to carry on the Rim Trail and are permitted at all South Rim viewpoints.
Which Grand Canyon scenic viewpoints are least crowded?
Grandview Point, Lipan Point, and Navajo Point along Desert View Drive are consistently less crowded than the central rim viewpoints near Grand Canyon Village. The 25-mile drive east of the village deters many visitors who rely on the free shuttle system, which does not serve this section of the rim. For photographers, this means more freedom to work compositions at your own pace and without competing for position at the rail.
Is it worth visiting the South Rim in winter for photography?
Winter is one of the most rewarding seasons for South Rim photography precisely because it is so undervisited. Snow on the rim and upper canyon walls creates dramatic visual contrast with the red and orange rock below. The crowds at every viewpoint are a fraction of summer levels, which means you can claim prime positions and hold them for as long as you need. The shorter days compress the golden hour windows, so planning your schedule carefully matters even more in winter than in summer.
Can I use a drone for Grand Canyon photography at the South Rim?
Drone use is prohibited within Grand Canyon National Park boundaries under National Park Service regulations. This applies to all areas within the park boundary, including all South Rim viewpoints, trails, and the canyon interior. Violations carry significant fines. Photographers seeking aerial perspectives on the canyon have options through licensed commercial helicopter and airplane tour operators who operate outside the park boundary, but personal drone use at any South Rim location is not permitted.
What camera settings work best for Grand Canyon landscapes?
During golden hour, a starting exposure of ISO 100, f/8, and a shutter speed determined by your meter reading of the mid-tones in the canyon wall will produce a reliable baseline. Adjust from there based on how much shadow detail you want to preserve. For blue hour, shift to ISO 400 or 800, keep f/8 for depth of field, and let your shutter speed extend to 15 to 60 seconds on a tripod. For telephoto compression shots during daylight, keep ISO as low as possible and use a shutter speed of at least 1/focal length (so 1/400 second minimum at 400mm) to prevent motion blur from camera vibration.
How does Grand Canyon photography change between the seasons?
Spring brings wildflowers along the rim edge and variable weather with good storm light potential. Summer delivers the longest golden hours and monsoon storm light, but also the most crowded conditions. Fall is widely considered the best overall season for canyon photography, combining lower crowds, atmospheric haze for aerial perspective, and warm morning light. Winter offers snow contrast and dramatic clearing weather conditions with very low competition for prime viewpoints.
What’s the difference between the South Rim and the North Rim for photography?
The South Rim is open year-round, paved, and accessible with a broad range of viewpoints and shooting positions. The North Rim is only open from mid-May through mid-October and receives a fraction of the South Rim’s visitor traffic. From a photography standpoint, the North Rim’s higher elevation (approximately 8,000 feet compared to the South Rim’s 7,000 feet) gives it a slightly different vantage, but the South Rim’s east-west road system and the variety of viewpoints it provides, from Desert View in the east to Hermit’s Rest in the west, makes it the more versatile photography destination for most visitors.
Should I take a guided tour for Grand Canyon photography?
Guided tours are particularly valuable for first-time visitors who want to cover multiple viewpoints efficiently and understand the canyon’s geography in context. Pink Jeep Tours, departing from Grand Canyon Visitor Center IMAX in Tusayan just outside the South Rim entrance, give photographers access to knowledgeable guides who can point out the named buttes and formations at each stop, advise on the best shooting positions, and manage the logistics of moving between viewpoints during time-sensitive light windows. Every Pink Jeep Tour originating from the facility includes a “Rivers of Time” IMAX ticket, which provides the geological and geographical orientation that makes in-park photography more intentional.
What should I do at the Grand Canyon Visitor Center IMAX before entering the park?
Watching “Grand Canyon: Rivers of Time” on the six-story IMAX screen with Laser technology before entering the park gives photographers a scale reference and geographical orientation that immediately improves their shooting decisions at the rim. The film covers the canyon’s geological history and river corridor with aerial and river-level perspectives that no rim viewpoint provides. Beyond the film, the facility sells various National Park entrance passes on-site, which saves time at the entrance station. If you’re planning a Pink Jeep Tour, booking through the on-site office means your tour departs from the front door with your IMAX experience already included. Book IMAX tickets online in advance to save 20%.
Are there photography restrictions at Grand Canyon National Park viewpoints?
Commercial photography requiring a permit and the use of professional support equipment (lighting rigs, large format systems, or crew) requires a filming and photography permit from the NPS. Personal and non-commercial photography with standard equipment, including tripods at rim viewpoints, does not require a permit. Photographers should stay on established trails and behind safety barriers at all viewpoints, both for their own safety and to protect the fragile cryptobiotic soil crust on the rim surface that takes decades to recover from foot traffic.
Key Takeaways for South Rim Photography
- Light timing is everything. East-facing viewpoints (Yavapai, Lipan, Desert View, Grandview) produce their best images at sunrise and mid-morning. West-facing viewpoints (Hopi, Mohave, Powell) are built for sunset. Plan your schedule around the light’s direction, not the map’s geography.
- Blue hour beats golden hour for mood. The 20-minute window after sunset, when the light is diffuse, cool, and even, produces the most atmospheric canyon images of the day. Don’t pack up when the sun drops.
- Get low on the Rim Trail. Shooting from 12 to 18 inches above the path surface between Powell Point and Hopi Point creates leading lines that give canyon photographs visual movement and depth that high-angle shots cannot achieve.
- Use telephoto at Grandview. Compression at 200mm to 400mm stacks the canyon’s geological layers in a way that wide-angle shots physically cannot. Grandview Point’s northeast-facing sightline to Horseshoe Mesa is the best location on the South Rim for this technique.
- Storm light is worth the discomfort. The 20-minute clearing window after an afternoon thunderstorm produces the most dramatic canyon light conditions of any season. Be in position before the storm fully clears and protect your gear with a rain cover.
- Desert View’s river reflection is time-sensitive. The Colorado River’s Unkar Delta catches direct late-afternoon light in a narrow window about 60 to 90 minutes before sunset. Miss that window and the river goes dark for the day.
- Orientation before arrival pays off. Watching “Grand Canyon: Rivers of Time” at Grand Canyon Visitor Center IMAX in Tusayan before entering the park gives you a working mental map of the canyon’s geography that immediately improves your compositional decisions at every viewpoint. Book online and save 20% on IMAX tickets.
- Two days is the minimum for serious photography work. A single day at the South Rim forces you to choose between sunrise and sunset and leaves you rushing between viewpoints. Two days, planned around the light cycle described in this guide, gives you four distinct golden hour windows and the flexibility to respond to unexpected weather conditions.

About the author
Explore The Canyon Editorial Team
See The Canyon

